

Discover the key to streamlined embroidery floss storage in this essential guide. Tailored for both novices and seasoned embroiderers, Punch digitizing delve into a variety of innovative storage methods. From economical DIY solutions to compact and efficient designs, find the perfect way to keep your floss organized, accessible, and in pristine condition, enhancing your crafting experience with every stitch.
Understanding your Needs

Before diving into the myriad of storage solutions for your embroidery floss, it’s vital to assess your specific needs. Your choice of storage method should not only be influenced by convenience but also by several other factors that define your embroidery practice. Let’s break down what you should consider:
Volume of Floss Skeins: The size of your collection is a primary determinant. Do you have a growing mountain of floss skeins or just a handful for specific projects? Larger collections require more organized and spacious solutions, while smaller assortments can be managed with simpler methods.
Available Storage Space: Evaluate the space where you plan to store your floss. Do you have ample room for larger storage units, or are you working with limited space that necessitates more compact solutions? Your workspace layout plays a significant role in determining the type of storage that will be both effective and feasible.
Budget Constraints: Storage solutions range from DIY options to premium organizers. Your budget will guide whether you opt for a cost-effective approach, like repurposing household items, or invest in specialized storage systems designed for embroidery floss.
Multiplicity of Projects: Consider the number of projects you work on concurrently. If you’re someone who juggles multiple projects, you’ll need a storage system that allows for easy access and segregation of floss pertinent to each project.
Portability Needs: If your custom embroidery journey takes you beyond a single stationary spot – perhaps you enjoy stitching in different locations or carry projects while traveling – portability becomes a key factor. In such cases, lightweight and compact storage options that protect your floss and are easy to transport become indispensable.
Access to Color Numbers vs. Color Selection by Sight: Finally, ponder over how you select your floss. Do you rely on specific color numbers for precise designs, or do you choose your threads based on visual appeal and color matching by eye? This aspect will influence whether you need a storage system that clearly displays color numbers or one that emphasizes color visibility.
Floss Storage Solutions
Choosing the right method to store and organize your embroidery floss can significantly impact your crafting experience. Here, we explore a variety of storage solutions, each with its own set of advantages and drawbacks, to help you find the perfect match for your needs.
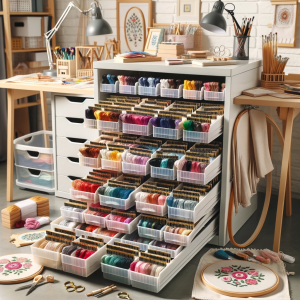
A. Drawers or Cabinets

- Storing full skeins in transparent or labeled drawers offers an organized and visually accessible approach.
- Pros: This method allows for easy organization and quick visibility of your threads, making selection hassle-free.
- Cons: Drawers and cabinets can be an expensive investment and may require considerable space in your crafting area.
B. Bobbin Boxes

- Bobbin boxes involve winding floss onto cardboard or plastic bobbins and arranging them in transparent storage boxes.
- Pros: They offer easy visibility of colors and are generally inexpensive and space-efficient.
- Cons: Preparing the bobbins can be time-consuming, and there’s a risk of the floss getting creased over time.
C. Project Cards in a Binder
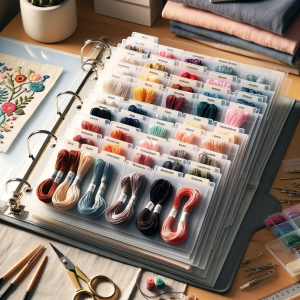
- This method utilizes acrylic organizer bars in a binder, allowing for neat and compact storage.
- Pros and Cons: It’s highly portable and provides easy access to your floss, but it requires cutting the threads to loop them through the organizer bars.
D. Hanging File Folder Method
- Similar to the binder method, this approach uses organizer bars in a file box or filing cabinet.
- Pros and Cons: It shares the organizational benefits of the binder method but is less portable, better suited for a stationary setup.
E. Thread Drops on a Key Ring
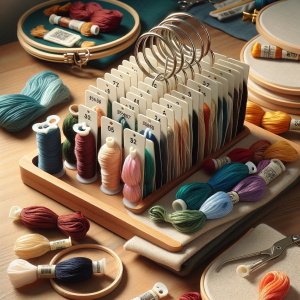
- Thread drops involve using stiff cardstock tags to hold skeins, which can be organized on a key ring.
- Pros and Cons: Ideal for managing a smaller selection of colors for individual projects; however, it might become unwieldy with large collections.
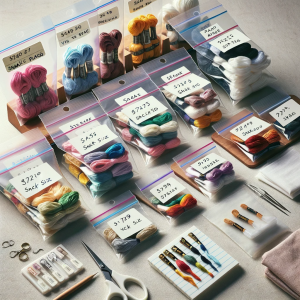
F. Plastic Bags

- A low-cost, DIY solution using snack-size plastic bags with index cards as labels.
- Pros and Cons: This method is highly flexible and cost-effective but may lack aesthetic appeal compared to other storage options.
G. Bonus Idea: Clothespins
- Creatively wrap your floss around mini clothespins and display them on a pegboard.
- Note: While this method adds a decorative element to your space, be cautious of direct sunlight exposure, which can fade the colors of your floss.
Each of these storage solutions offers unique benefits and potential limitations. Your choice should align with your personal needs, space, and crafting style, ensuring your embroidery floss is both well-organized and easily accessible.
Learn about: 8 best embroidery digitizing machines in 2024
Organizing Your Floss
After selecting your storage solution, the next step is organizing your floss in a way that enhances your cap embroidery experience. A well-organized floss collection not only saves time but also inspires creativity. Let’s explore some effective strategies for organizing your embroidery floss:
Organizing by Color or Number:
- Color-Based Organization: Arrange your floss based on color shades. This method is visually appealing and helps in quickly identifying the perfect hue for your project. You can follow the spectrum order or group similar shades together.
- Number-Based Organization: If your projects require specific color numbers, organize your floss according to their assigned numbers. This approach ensures precision and is especially useful when following pattern instructions that specify color numbers.
Tips for Adding New Colors to Your Collection:
- Space for Expansion: When organizing, leave some room for new additions. This foresight prevents the need for a complete reorganization every time you acquire new floss.
- Integration Strategy: Decide on a system for integrating new colors—whether it’s slotting them into the existing order or dedicating a specific section for new skeins. Consistency in this approach keeps your system efficient.
Maintaining an Organized System:
- Regular Updates: Periodically review and update your storage to accommodate any changes in your collection or crafting habits.
- Labeling: Clearly label sections, especially if you’re using non-transparent storage options. Labels can be based on color shades, number ranges, or project types.
- Accessibility: Keep frequently used colors or those for current projects in more accessible locations. This minimizes disruption to the overall organization when frequently accessing certain skeins.
- Protecting Floss Quality: Ensure your storage method protects the floss from dust, moisture, and light, especially if your collection includes delicate or specialty threads.
Takeaway
We’ve explored various embroidery floss storage solutions, emphasizing the importance of choosing a method that aligns with your personal needs and space. Whether it’s drawers, bobbin boxes, binders, or another system, the key is finding what works best for you. We invite you to share your own storage tips and experiences in the comments, enriching our crafting community with your insights.
Also read: best embroidery Scissors you can buy in 2024


