

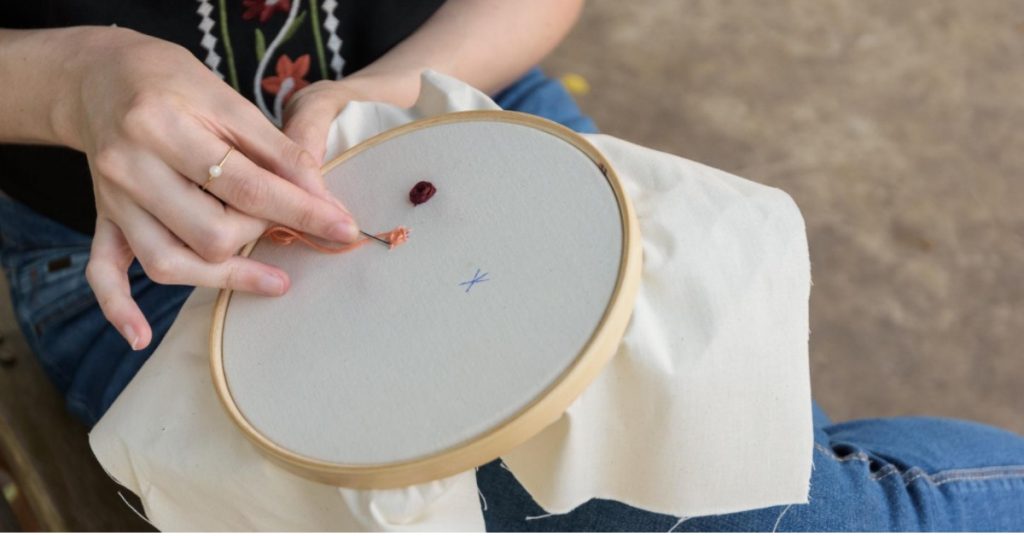
Using a needle and thread, embroidery is a lovely and complex art form that lets you express your ideas. Even the most skilled embroiderers occasionally make mistakes when stitching, though. Don’t worry if there’s a stitch that went wrong, a color mismatch, or a design flaw. In this blog we will very easily explain how to fix embroidery mistakes.
One of the most crucial elements of the embroidered finishing process’s quality is the product’s finishing. To enhance the quality of the job and provide clients with superior digitizing services, the embroiderer must finish the work after completing the embroidery.
Want To Fix Your Embroidery Mistakes Professionally?
Don’t let embroidery mistakes ruin your project. Let Punch Digitizing’s experts fix it
Common embroidery mistakes
Misaligned patterns
Tangled threads can throw off the alignment of a pattern, especially when changing needles or working close to the embroidery frame.
Color bleeding Issues
Take care to select colorfast thread when sewing. To test the thread’s endurance, soak it in vinegar and hot water first. If the threads’ color is not saved it will ruin the full work.
Fabric Damage
If you use an embroidery needle that is too big for the project, the fabric may get holes where the needle and thread go through. Also, it may result in puckered cloth.
Thread Tension Problems
There will be more white bobbin thread visible on the underside of the custom embroidery if the top tension is overly tight. You’ll see a lot more of the top thread if it’s too loose. When the lines at the bottom of the stitching are equal and spaced about one-third apart, you will know the tension is adjusted right.
Tools and Materials Needed for Fixing Mistakes

The necessities listed are what you’ll need to finish the embroidery projects.
Essential Embroidery Tools
- Six-inch plastic hoops for embroidery
- 6-inch wooden embroidery hoops—you’ll need three for each of the three crafts, depending on how many patterns you want to frame
- A set of needles for embroidery
- A pen that dissolves in water
- scissors for embroidery and pinking
- Fabric glue
- Fabri-Tac Steam Iron
- Ironing board
- Some kind of light tablet or lightbox
- A printer/scanner to print and create patterns
Additional Helpful Materials
- Castile soap or laundry soap without scent (used to wash embroidery)
- An ironing board (used for blocking embroidery), clothespins, and sewing pins.
- a piece of strong canvas larger than your embroidery
- water-filled spray bottle
- Three, four, and five-inch embroidery hoops to aid with border drawing on designs
- Sewing rulers that are clear for designing patterns
- Bobbins of embroidery floss
- Containers for storing floss
Tips on Selecting Quality Tools and Materials
An embroiderer needs to understand the role and importance of tools to fix embroidery mistakes. Possibly the most useful tool you have is patience. Machine embroidery requires time to remove, so you’ll need to consider how much the item is worth about the time required.
We need to select tools and materials according to our embroidery work. A common method for creating hats and caps using embroidery software is cap and hat digitizing. This method is still in use today and has been for a very long time. This method aims to apply text on caps and hats without requiring other tools. Digitizing a cap or hat is an easy process. Designs are converted into digital files using it.
In 3d Puff Embroidery, a raised design is created by sewing thread over a piece of foam. 3D embroidery patterns usually come at an additional cost because it takes more time, unique expertise, and materials.
How To Fix Embroidery Mistakes Step-by-Step Guide To Fixing Mistakes
Examine the embroidery errors closely and assess their severity before taking any corrective action, whether it’s to eliminate statin stitches or prevent embroidery issues. Selecting the best course of action to correct the error will be made easier if you are aware of its scope.
Correcting Misaligned Patterns
- Hit [MENU].
- To view the screen below, press [△] twice after pressing [▲] once.
- Hit [ENTER].
- Verify the P&C1 test pattern.
- Tap [▼] twice to bring up the screen below.
- Hit [ENTER].
- To view the screen, press [▲].
- Verify the corrected values obtained from the P&C2 test pattern condition.
- Hit [▷].
- Once the correction numbers have been set to your satisfaction, hit [ENTER].
- Hit [ENTER].
Addressing Color Bleeding
Rinse, rinse, rinse, rinse if colors bleed when being laundered. Rinse forty to fifty times, without fear! Even after drying, the item might be salvageable if the bleeding contaminates other fibers. The object should be submerged in ice-cold water until the color begins to emerge.
Repairing Fabric Damage
Errors can occasionally result in the fabric weakening or deforming. You can reinforce the region using a stabilizer or backer to remedy this. Trim a small piece of backing fabric or stabilizer to fit the problematic area, then carefully stitch it to the back of the embroidery, making sure the stitching lines up with the error. This method stops additional deterioration of the materials and adds support.
Fixing Thread Tension Issues
The thread should be sturdy enough to complete your job without being overly tight to the point that wearing the final item becomes uncomfortable.
How to remove Satin Stitches
If you have a stitch eraser (a variety of banded erasers, similar to a barber’s clipper), carefully move the eraser back and forth over the backside until you see the stitches being cut, as directed by the manufacturer. When completed correctly, it will resemble fuzz.
It’s important to keep in mind that you won’t be able to extract every stitch from your clothing in one go, but you should be able to extract the majority and then go back with tweezers or embroidery scissors to complete the task. You can work on a few threads at a time and achieve the same results with little embroidery scissors or a seam ripper.
How to Remove Tatami Stitches
Tatami is a little different, but it can be taken off with perseverance. A brick-like stitch is used to make tatami. The top and bobbin threads are the same type, but pointed at an angle, despite the off-set stitches.
When using a stitch eraser on tatami and other patterned stitching, it is best to work slowly and cautiously from the rear. To see your progress, you might need to remove stitches and then use a link roller to remove the fuzz because tatami stitches are typically thinner. Using tweezers to separate wads of thread and remove bobbin threads will be helpful.
How To Remove Straight Stitches
If you are fortunate enough to have discovered your error and are left with merely straight stitches or lines of basting, you can periodically cut and remove the bobbin thread (on the backside) with tweezers or fine scissors. The satisfaction of only plucking the top thread and seeing it emerge will come from that.
Prevention Measures And Best Practices
Here’s a collection of pointers to assist you in staying away from frequent embroidery blunders and guaranteeing the greatest possible outcome for your completed creation.
Preventing Common Mistakes
- Select the appropriate clothes for your undertaking.
- Select the appropriate needle.
- Select a transfer technique that is suitable for the kind of embroidery you are working on.
- Employ a hoop properly.
Embroidery Best Practices
- Transparent backgrounds are a requirement for graphics. Only your logo should remain in your file; other elements of your design may require applique digitizing as well.
- Think of the six thread colors that each design can have.
- Steer clear of extremely thin lines
- Don’t exceed the 15,000 stitch maximum
- Keep things straightforward.
Advice on maintaining High-Quality Work And Avoiding Errors
The fabric you choose can have a significant impact on how your embroidery looks overall. Don’t use the incorrect fabric. One of the biggest mistakes is to not take the fabric. Avoid separating the threads. Varying the quantity of thread strands used can improve the overall appearance of the embroidery creation. Avoid overly tightening your stitches. Not every stitch should “tug,” but rather should effectively lie on top of the fabric.
Advanced Tips and Tricks
Expert Techniques for Difficult Fixes
Make sure you have a precise and unambiguous design or pattern before beginning any embroidered project. Check proportions, hues, and positioning to prevent errors early on.
Before beginning your main project, practice on a piece of scrap fabric if you’re new to embroidery designs or trying out a new method. This helps you avoid making mistakes by allowing you to become familiar with the stitches
Creative Solutions for Irreversible Mistakes
We faced failure when embroidered errors occurred. Acceptance of the unexpected and turning it into deliberate elements. The use of different types of decorative beads makes it more attractive for spectators. There is a need to use gradients, mixed media, and thread thickness to provide depth and deflect attention.
To make them clear errors can be framed with elaborate features. Inventive fixes save and improve embroidery, and tenacity and inventive artistic ability.
Innovating Ideas to Turn Mistakes Into Design Features
They only need to have a creative mind to turn errors into design elements. If we accept flaws and learn how to fix embroidery mistakes we can get a chance to convey our artistic views. The use of appliqué or patches goes well with the overall design to softly incorporate the unexpected into purposeful elements.
When we bring new ideas to the table, faults become not only fixable problems but essential elements that add to the overall artistic creation’s appeal.
Conclusion
Don’t be afraid to make mistakes! Professionals are not immune to mistakes. Turning a setback into a learning opportunity is always simply a matter of perspective. Make an effort to adapt and see the errors as an opportunity to learn how to fix embroidery mistakes or even to create new techniques. Consequently, these were some of the errors that the majority of novice embroiderers made.
FAQs
How can one avoid selecting the incorrect embroidery fabric?
Try working with a tight-weave linen cloth or 100% cotton if you are new to embroidery.
Can a machine that embroiders also sew?
some embroidery machines can also sew, others are only meant to be used for embroidery.
What is the term for needlework?
Along with quillwork and featherwork, basic techniques include crewel work, needlepoint, cross-stitch embroidery, and quilting.


