Aziz

Captain America embroidery patches

How to Digitize Embroidery Patches? Professional Guide By Punch Digitizing

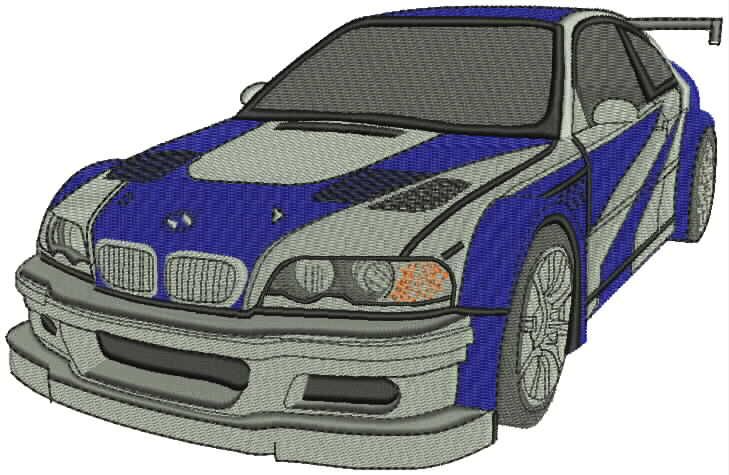
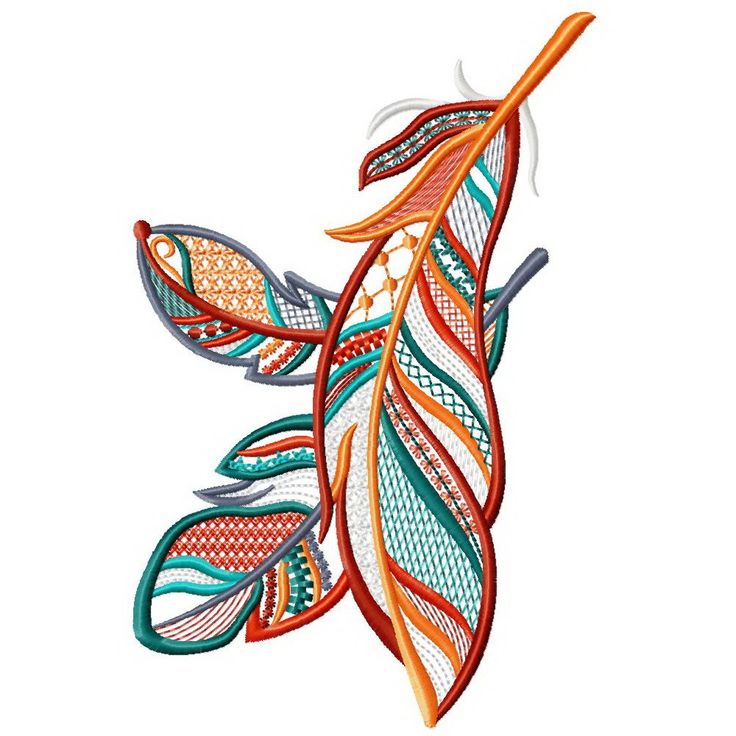
Punch Digitizing USA will give you professional guide about how to creating custom embroidery patches is an art form that combines creativity with technical skills. Digitizing embroidery patches involves converting a digital image into a format that embroidery machines can read and stitch out. This process is crucial for achieving precise, professional-looking patches that stand out. In this guide, we’ll walk you through the step-by-step process of how to digitize embroidery patches, ensuring your designs are both beautiful and durable. Understanding Embroidery Digitization Before diving into the process, it’s important to understand what embroidery digitization is. Digitization is the process of transforming artwork into a digital file that guides embroidery machines on how to stitch the design. This file includes instructions on stitch type, direction, color changes, and other specifics that ensure the final output matches your vision. Step 1: Choose the Right Software The first step in learning how to digitize embroidery patches is selecting the right software. There are several digitizing software options available, ranging from beginner-friendly to advanced. Popular choices include Wilcom, Brother PE-Design, and Hatch Embroidery. These programs offer various tools and features that help in creating precise and clean embroidery designs. Step 2: Import Your Design Once you have your software set up, the next step is to import the image you want to convert into an embroidery patch. It’s essential to start with a high-quality image, as this will make the digitization process smoother and the final output more detailed. Common formats for import include JPEG, PNG, and SVG. Step 3: Set the Correct Size and Stitch Type The size of your patch will determine the stitch type and density. It’s crucial to set these parameters before you begin digitizing to avoid any complications later on. For instance, smaller patches may require satin stitches, while larger ones might be better suited for fill stitches. The choice of stitch type affects both the appearance and durability of the patch. Step 4: Outline the Design Elements After setting the size and stitch type, outline the different elements of your design using the digitizing tools in your software. This step is critical as it guides the embroidery machine on where to stitch. Be meticulous in outlining to ensure every detail is captured accurately. Step 5: Assign Stitch Directions and Angles Stitch direction and angle significantly influence the texture and appearance of your embroidery patch. Properly assigned directions help in achieving a smooth, professional finish. Use the software tools to set the stitch angles for each section of your design. Step 6: Choose the Right Colors and Thread Types Selecting the appropriate thread colors and types is another vital aspect of digitizing embroidery patches. Your software will allow you to assign specific colors to different parts of your design. It’s crucial to choose threads that match the desired look and feel of your patch. Step 7: Simulate and Test Your Design Once the design is digitized, simulate it using the software to check for any errors or areas that need improvement. This step helps in identifying issues like thread breaks, gaps, or overlapping stitches that might occur during the actual embroidery process. Step 8: Save and Export Your File After finalizing your design, save the file in the appropriate format compatible with your embroidery machine. Common formats include .DST, .PES, and .EXP. Make sure to back up your files to prevent any loss of data. Step 9: Test Run on Fabric Before mass production, it’s wise to do a test run on a similar fabric to what you’ll use for the final patches. This step allows you to make any necessary adjustments and ensure that the design translates well from the screen to the fabric. Tips for Successful Embroidery Patch Digitization Understand the Fabric: Different fabrics react differently to stitches. Knowing the fabric type will help you adjust the stitch density and type accordingly. Simplify Complex Designs: Highly intricate designs might not translate well in embroidery. Simplify where necessary to maintain clarity and quality. Stay Updated: Embroidery digitization technology is constantly evolving. Staying up-to-date with the latest software updates and tools can help enhance your digitizing skills. Conclusion Learning how to digitize embroidery patches is a valuable skill that requires practice, patience, and attention to detail. By following the steps outlined in this guide, you’ll be on your way to creating stunning, professional-quality patches that meet your client’s needs and expectations. Remember, the key to successful digitization lies in understanding your tools and materials and continuously refining your skills. Contact Punch Digitizing USA today!

How to Digitize Embroidery Patches? Professional Guide By Punch Digitizing Read More »

Cost effective cap digitizing

Factors Affecting the Cost of Cap Digitizing: A Comprehensive Guide for Businesses

Introduction In the world of embroidery digitizing, cost considerations play a vital role in decision-making for businesses looking to enhance their brand with custom-embroidered caps. Whether you’re a small startup or a large corporation, understanding the factors that affect the cost of cap digitizing can help you budget effectively and make informed decisions. At Punch Digitizing, we offer transparent pricing and high-quality services tailored to your needs. In this blog post, we’ll explore the various factors that influence the cost of cap digitizing and provide tips on how to manage expenses without compromising quality. 1. Complexity of the Design One of the most significant factors affecting the cost of cap digitizing is the complexity of the design. Intricate designs with detailed elements require more time and expertise to digitize, which can lead to higher costs. Key Considerations: Detail Level: The more detailed the design, the more stitches are required. This increases both the digitizing time and the embroidery time, leading to higher costs. Color Changes: Designs with multiple color changes may require additional setup time, contributing to the overall cost. Size of the Design: Larger designs may require more stitches and adjustments, which can impact pricing. Cost Management Tips: Simplify complex designs without losing their essence. Focus on key elements that convey the message. Consider reducing the number of color changes if possible, as this can streamline the process and reduce costs. Work with a professional digitizer who can optimize the design for embroidery, ensuring efficiency without sacrificing quality. For more on managing complex designs, explore common challenges in cap digitizing. 2. Type of Fabric The type of fabric used in the cap can also influence the cost of digitizing. Different fabrics have varying characteristics that may require specialized digitizing techniques and adjustments. Fabric Types: Cotton: Generally easier to work with, cotton requires fewer adjustments, leading to lower costs. Polyester: While durable, polyester may be prone to puckering, requiring careful digitizing to ensure quality. Wool and Denim: Thick fabrics may necessitate special needles and settings, potentially increasing the cost. Lycra/Spandex: Stretchy fabrics require stabilization techniques to prevent distortion, which can affect pricing. Cost Management Tips: Select fabrics that align with your design goals and budget. Cotton and polyester often offer a balance of quality and affordability. Work with an experienced digitizer who understands how to adapt designs to various fabric types, ensuring the best results at a reasonable cost. Discover how different fabrics impact the process in our article on how fabric type affects the digitizing process. 3. Stitch Count Stitch count is a critical factor in determining the cost of cap digitizing. The number of stitches directly impacts the time and resources required to complete the embroidery. Key Considerations: Density of Stitches: Higher stitch density increases the time and effort needed for digitizing and embroidery, leading to higher costs. Stitch Types: Different stitch types, such as satin stitches and fill stitches, may have varying costs depending on the complexity and appearance required. Cost Management Tips: Optimize stitch density to ensure durability and aesthetics without unnecessary complexity. Choose the appropriate stitch types for each design element, balancing visual appeal and cost-effectiveness. Collaborate with a professional digitizer who can recommend efficient stitch patterns tailored to your needs. For more insights on optimizing stitches, check out our article on common challenges in cap digitizing. 4. Quantity of Caps Ordered The quantity of caps ordered can significantly affect the cost per unit. Larger orders often benefit from bulk pricing, while smaller orders may have higher per-unit costs due to setup fees and other fixed expenses. Bulk Orders: Economies of Scale: Ordering in bulk allows for economies of scale, reducing the cost per cap as fixed costs are spread across more units. Discount Opportunities: Many digitizing services offer discounts for larger orders, making it more cost-effective to order in bulk. Cost Management Tips: Plan ahead and consolidate orders to take advantage of bulk pricing. Communicate with your digitizing provider about potential discounts for large quantities. Consider partnering with other departments or businesses to increase order size and leverage cost savings. 5. Turnaround Time The required turnaround time for cap digitizing can also impact costs. Rush orders often come with additional fees to prioritize your project and meet tight deadlines. Key Considerations: Standard vs. Rush Orders: Standard orders typically offer the most cost-effective pricing, while rush orders may incur extra charges for expedited service. Production Capacity: The availability of resources and capacity to handle your order can influence pricing, especially for urgent requests. Cost Management Tips: Plan your orders well in advance to avoid rush fees and ensure ample time for production. Discuss timelines with your digitizing provider and choose a schedule that aligns with your budget and needs. Evaluate your project timeline and prioritize orders based on their urgency and importance. 6. Experience and Expertise of the Digitizing Provider The experience and expertise of the digitizing provider can influence costs, but it also affects the quality and reliability of the final product. Key Considerations: Skill Level: Experienced digitizers may charge higher rates, but their expertise often translates into superior results and efficient processes. Reputation: A reputable provider with a track record of successful projects can provide peace of mind and assurance of quality. Cost Management Tips: Invest in a reputable provider with proven experience to ensure the best results for your project. Consider the value of quality and expertise when evaluating pricing, as cheaper options may lead to subpar results and additional costs for corrections. Request samples or references to assess the provider’s skills and capabilities before making a decision. Conclusion Understanding the factors that affect the cost of cap digitizing is essential for businesses looking to make informed decisions and achieve the best results. By considering design complexity, fabric type, stitch count, order quantity, turnaround time, and the experience of the digitizing provider, you can effectively manage your budget and achieve high-quality, custom-embroidered caps. Contact Punch Digitizing, we offer transparent pricing and expert guidance to help you navigate the digitizing process and

Factors Affecting the Cost of Cap Digitizing: A Comprehensive Guide for Businesses Read More »

Marketing with caps

The Impact of Caps in Corporate Marketing Strategies: Boost Your Brand Visibility

Introduction In the world of corporate marketing, businesses are always on the lookout for innovative ways to enhance brand visibility and connect with their audience. Custom caps have emerged as a versatile and effective tool in achieving these objectives. As wearable items, caps offer an excellent platform for branding and engagement. At Punch Digitizing, we understand the power of custom-embroidered caps and how they can elevate your marketing efforts. In this blog post, we’ll explore the various roles caps play in corporate marketing strategies and share insights into making the most of this promotional medium. 1. Caps as a Branding Tool Caps are more than just a fashion accessory; they are a powerful branding tool that can help businesses establish and reinforce their brand identity. When a company invests in custom-embroidered caps, they create a unique opportunity to showcase their logo, colors, and message. Brand Recognition Visibility: Caps provide a prominent display for your brand, making them highly visible in crowded places like trade shows, sports events, and public gatherings. Consistency: Consistent branding on caps helps reinforce your brand’s visual identity. By using your logo and brand colors, you create a cohesive image that resonates with your audience. Professional Image Employee Uniforms: Caps can be part of employee uniforms, promoting a professional image and fostering a sense of unity within the team. Client Engagement: Distributing caps to clients and partners can strengthen relationships and show appreciation, enhancing your brand’s image as thoughtful and customer-focused. Real-Life Example Many companies have successfully used caps to enhance their branding efforts. For instance, Punch Digitizing provided custom caps for a local sports team, helping them create a strong brand presence during community events. For more insights on overcoming design challenges, read about common challenges in cap digitizing. 2. Caps as a Marketing Tool Incorporating caps into your marketing strategy can lead to increased brand awareness and engagement. Here’s how caps can serve as a marketing tool: Event Giveaways Trade Shows: Distributing caps at trade shows and conferences can attract attention and draw potential customers to your booth. Attendees are more likely to remember your brand when they have a tangible item to take home. Community Events: Participating in community events and sponsoring local activities provide opportunities to distribute branded caps, fostering goodwill and community engagement. Promotional Campaigns Limited Edition Caps: Offering limited edition caps as part of a promotional campaign creates a sense of exclusivity and urgency. This can drive interest and sales, especially if the caps feature unique designs or collaborations. Social Media Engagement: Encourage customers to share photos of themselves wearing your branded caps on social media. This user-generated content can boost your online presence and reach new audiences. Real-Life Example A well-known beverage company used caps as part of their summer promotion, offering limited edition designs that featured vibrant artwork and brand messaging. The campaign generated buzz on social media and increased brand visibility. Explore more about the impact of fabric choices on design in our article on how fabric type affects the digitizing process. 3. Caps as a Customer Loyalty Tool Building customer loyalty is crucial for long-term success, and caps can play a significant role in fostering that loyalty. Here’s how: Customer Appreciation Gifts for Loyal Customers: Offering caps as gifts to loyal customers can strengthen their connection to your brand. Personalized caps with the customer’s name or a special message add an extra layer of appreciation. Membership Rewards: Incorporate caps into your loyalty program as rewards for milestones or achievements. This encourages continued engagement and incentivizes repeat business. Creating a Sense of Belonging Community Building: Caps can help create a sense of belonging among your customers. By wearing your branded caps, customers become part of a community, fostering a feeling of loyalty and camaraderie. Brand Advocates: Encourage satisfied customers to become brand advocates by wearing and promoting your caps. Word-of-mouth marketing is powerful, and enthusiastic customers can spread the word about your brand. Real-Life Example A retail brand used custom-embroidered caps as part of their VIP customer program, offering exclusive designs to top-tier members. This strategy not only increased loyalty but also encouraged other customers to aspire to VIP status. 4. Caps as a Team Building Tool Caps aren’t just for customers; they can also play a role in team building and employee engagement. Here’s how: Employee Morale Uniformity and Pride: Providing employees with branded caps as part of their uniform fosters a sense of pride and belonging. It can also enhance team spirit and create a cohesive look for public-facing roles. Recognition and Rewards: Use caps as rewards for employee achievements or as part of recognition programs. This can boost morale and motivate employees to excel in their roles. Corporate Events Team Events: Custom caps can be part of team-building events, fostering unity and a sense of shared identity among participants. They serve as lasting mementos of the experience. Company Outings: During company outings or retreats, branded caps provide a unified look and help employees feel part of the corporate family. Real-Life Example A tech company used caps during their annual retreat, providing each employee with a personalized cap featuring their department logo. The initiative was well-received and contributed to a sense of unity across the organization. Discover strategies to overcome complex designs in our article on common challenges in cap digitizing. 5. Caps as a Fundraising Tool Caps can also be used as part of fundraising efforts, supporting causes that align with your brand’s values. Charity Partnerships Collaborative Campaigns: Partner with charitable organizations and offer branded caps as part of fundraising campaigns. This not only supports a good cause but also enhances your brand’s reputation as socially responsible. Limited Edition Designs: Create limited edition cap designs that highlight the cause you’re supporting. Proceeds from sales can go directly to the charity, driving interest and contributions. Cause Awareness Event Sponsorship: Sponsor events that align with your brand’s mission and provide caps to participants. This raises awareness for both the cause and your brand. Employee Involvement: Encourage

The Impact of Caps in Corporate Marketing Strategies: Boost Your Brand Visibility Read More »

fabric in cap digitizing

How Fabric Type Affects the Digitizing Process: Key Considerations for Embroidery Success

Introduction When it comes to embroidery digitizing, fabric type plays a crucial role in determining the outcome of the design. Whether you’re working with cotton, wool, polyester, or any other material, understanding how different fabrics interact with stitches is essential for achieving high-quality results. At Punch Digitizing, we specialize in adapting designs to suit various fabric types, ensuring that each piece looks professional and polished. In this blog post, we’ll explore how fabric type affects the digitizing process and share insights into overcoming related challenges. 1. Understanding Fabric Properties Before diving into the specifics of digitizing for different fabrics, it’s important to understand the fundamental properties of fabrics that impact embroidery. Key Fabric Properties: Weave Type: The way fibers are interlaced can affect stitch penetration and tension. Stretchability: Stretchy fabrics require special consideration to prevent distortion. Thickness: Thick fabrics may need longer needles and higher tension settings. Texture: Textured fabrics may hide small details or require more prominent stitches. Understanding these properties is the first step in adapting your digitizing process to suit the fabric. 2. Common Fabric Types and Their Impact on Digitizing Cotton Impact on Digitizing: Pros: Cotton is a versatile fabric that’s relatively easy to work with. It’s stable, which means it doesn’t stretch much and holds stitches well. Cons: Cotton may shrink after washing, so pre-washing is recommended. Tips for Digitizing: Use medium-density stitches to ensure that the design holds well without puckering. Select a needle size appropriate for the thickness of the cotton. Typically, a 75/11 needle works well. Polyester Impact on Digitizing: Pros: Polyester is durable and resistant to shrinkage, making it a popular choice for caps and other apparel. Cons: It may be prone to puckering if stitches are too dense. Tips for Digitizing: Use a lower stitch density to prevent puckering. Opt for polyester thread to match the fabric’s properties, as it has similar stretch and sheen. Wool Impact on Digitizing: Pros: Wool is thick and has a natural elasticity, providing a unique texture. Cons: It can be challenging to embroider due to its thickness and tendency to fuzz. Tips for Digitizing: Choose larger, more open designs to accommodate the fabric’s texture. Use a sharp needle to penetrate the dense fibers. Denim Impact on Digitizing: Pros: Denim is sturdy and holds embroidery well, making it ideal for detailed designs. Cons: Its thickness can cause needle breaks if not handled properly. Tips for Digitizing: Use heavy-duty needles and appropriate stabilizers to prevent damage. Adjust tension settings to accommodate the fabric’s thickness. *Learn more about handling tough materials in our article on common challenges in cap digitizing. Lycra/Spandex Impact on Digitizing: Pros: These fabrics are extremely stretchy, offering comfort and flexibility. Cons: High elasticity can lead to design distortion. Tips for Digitizing: Use stretch needles and consider underlay stitches to stabilize the design. Test designs on a scrap piece before applying them to the final product. 3. Choosing the Right Needle and Thread The right needle and thread are crucial components of successful embroidery, especially when dealing with various fabric types. Needle Selection: Ballpoint Needles: Ideal for knit fabrics, preventing snags. Sharp Needles: Suitable for woven fabrics, allowing for precise penetration. Heavy-Duty Needles: Necessary for thick materials like denim and wool. Thread Selection: Polyester Thread: Versatile and durable, suitable for most fabrics. Cotton Thread: Offers a natural look but may lack strength on heavy-duty materials. Silk Thread: Provides a luxurious sheen, best for special occasions and delicate fabrics. 4. Utilizing Stabilizers Stabilizers play a vital role in maintaining the integrity of the design during embroidery. Choosing the right stabilizer depends on the fabric type and the complexity of the design. Types of Stabilizers: Cut-Away Stabilizers: Best for stretchy fabrics, offering permanent support. Tear-Away Stabilizers: Suitable for stable fabrics like cotton, removed after stitching. Wash-Away Stabilizers: Used for delicate fabrics, dissolving in water. Choosing the Right Stabilizer: For stretchy fabrics like lycra, use a cut-away stabilizer to prevent distortion. For denim and thick materials, tear-away stabilizers can provide temporary support without leaving residue. Delicate fabrics may benefit from wash-away stabilizers that provide support without affecting the fabric’s feel. *For more details on stabilizer use and its impact on costs, explore our article on factors affecting the cost of cap digitizing. 5. Adapting Designs for Fabric Characteristics Adapting designs to match fabric characteristics ensures that the final embroidery looks polished and professional. Design Considerations: Simplicity vs. Complexity: Complex designs may not work well on textured fabrics like wool. Simplify where necessary. Contrast and Color: Consider how the fabric’s color interacts with the design. High contrast can make designs pop, while subtle contrasts can create a softer look. Size and Scale: Larger designs may suit bold fabrics like denim, while smaller designs work better on lightweight materials. 6. Managing Challenges in Fabric-Specific Digitizing Fabric-specific digitizing comes with unique challenges, such as thread breaks, puckering, and distortion. Common Challenges: Puckering: Adjust stitch density and tension to avoid puckering on lightweight fabrics. Thread Breaks: Ensure needle and thread compatibility, especially on thick materials. Distortion: Use underlay stitches and proper stabilization to prevent distortion on stretchy fabrics. Conclusion Understanding how fabric type affects the digitizing process is essential for achieving exceptional embroidery results. By considering the unique properties of each fabric, choosing the right tools, and adapting designs accordingly, you can overcome common challenges and produce stunning embroidered caps. Contact us for cap digitizing, we specialize in tailoring designs to meet the needs of various fabrics, ensuring high-quality outcomes every time.

How Fabric Type Affects the Digitizing Process: Key Considerations for Embroidery Success Read More »

Cap digitizing challenges

Overcoming Common Challenges in Cap Digitizing: Expert Tips from Punch Digitizing

Introduction Cap digitizing is a specialized field that involves converting designs into a digital format compatible with embroidery machines. While the process opens up endless creative possibilities, it also presents a unique set of challenges. As a leading service provider in the USA, Punch Digitizing has tackled these challenges head-on, ensuring high-quality results for businesses across the country. In this blog post, we’ll explore some of the most common challenges in cap digitizing and share tips on how to overcome them. 1. Understanding the Unique Shape of Caps The Challenge: One of the primary challenges in cap digitizing is working with the curved and sometimes irregular surfaces of caps. Unlike flat garments, caps have a structured form that can make it difficult to position designs accurately. The Solution: To overcome this, digitizers must take into account the shape and contour of the cap during the design phase. Using specialized digitizing software allows for precise adjustments, ensuring the design fits perfectly on the curved surface. Techniques: Use grid guides within your software to align elements of your design accurately. Consider the center-out method when digitizing to ensure that your design sits symmetrically. Adapt your design for the most common cap types, such as structured and unstructured caps, to ensure flexibility in application. 2. Dealing with Design Complexity The Challenge: Complex designs with intricate details pose significant challenges in cap digitizing. The small surface area available on a cap means that every element of the design must be carefully planned to ensure visibility and clarity. The Solution: Simplification: Simplify complex designs without losing their essence. Focus on key elements that convey the message. Stitch Type Selection: Choose appropriate stitch types for different parts of the design. For instance, use satin stitches for lettering and small details, and fill stitches for larger areas. Testing: Always run a test stitch to see how the design translates from screen to fabric. Adjust as needed based on the test results. 3. Managing Thread Tension and Density The Challenge: Thread tension and density are crucial factors in cap digitizing. Incorrect settings can lead to issues such as puckering, thread breaks, or a design that doesn’t lay flat against the cap. The Solution: Tension Settings: Adjust your embroidery machine’s tension settings to match the cap’s fabric and the design’s complexity. Experiment with different settings to find the optimal balance. Density Adjustments: Keep an eye on the stitch density. Overly dense designs can lead to thread breaks, while too loose designs may not cover the cap properly. Consider the type of fabric you’re working with when setting the density. If you’re curious about how fabric types can impact digitizing, explore more about how fabric type affects the digitizing process. 4. Handling Different Fabric Types The Challenge: Caps come in a variety of materials, from cotton and wool to synthetic blends. Each fabric type presents its own challenges regarding needle selection, thread type, and digitizing technique. The Solution: Needle and Thread Selection: Choose the appropriate needle and thread for the fabric. For example, a ballpoint needle is ideal for knit fabrics, while a sharp needle suits woven materials. Fabric Testing: Conduct tests on small sections of the cap fabric to see how it responds to different stitch types and densities. Adjust your digitizing approach based on these tests. For a deeper dive into this topic, consider reading about how fabric type affects the digitizing process . 5. Ensuring Accurate Alignment The Challenge: Maintaining alignment throughout the digitizing process is crucial for achieving professional results. Misalignment can lead to skewed designs that detract from the overall appearance of the cap. The Solution: Hoop Selection: Use the correct hoop for the cap size and style. A cap hoop or frame specifically designed for curved surfaces can help maintain alignment. Positioning Marks: Utilize positioning marks or templates to ensure that the cap is properly aligned in the embroidery machine. This helps in maintaining consistency across multiple caps. Digitizing Strategies: Employ digitizing strategies such as sequence planning, where elements of the design are stitched in a specific order to maintain alignment and reduce movement. Discover more about managing alignment and other factors affecting the cost of cap digitizing. 6. Navigating Thread Breaks and Machine Issues The Challenge: Thread breaks and machine malfunctions can disrupt the digitizing process and lead to delays or subpar results. The Solution: Regular Maintenance: Keep your embroidery machines well-maintained to reduce the likelihood of thread breaks and malfunctions. Clean and oil your machines regularly, and replace worn parts as needed. Quality Threads: Use high-quality embroidery threads that are less prone to breaking. Consider using threads designed for high-speed machines for optimal performance. Monitoring: Keep a close eye on the machine during operation to catch issues early. If a thread break occurs, pause the machine and carefully re-thread to avoid further issues. 7. Customizing Designs for Specific Needs The Challenge: Different clients have different needs, and customization is key to meeting those expectations. However, this can be challenging when dealing with unique designs and specifications. The Solution: Client Collaboration: Work closely with clients to understand their vision and requirements. Offer suggestions and expertise to help them achieve their desired results. Flexibility in Design: Be flexible and willing to adapt your designs to suit the client’s needs. This may involve altering color schemes, adjusting design elements, or incorporating logos. Prototype Development: Consider creating prototypes for client approval before proceeding with large-scale production. This allows for adjustments and ensures client satisfaction. Explore how caps play a crucial role in corporate marketing strategies to understand how businesses leverage customization. 8. Managing Bulk Orders and Deadlines The Challenge: Handling bulk orders while maintaining quality and meeting deadlines is a common challenge in the cap digitizing industry. The Solution: Efficient Workflow: Develop an efficient workflow that prioritizes quality and speed. Automate repetitive tasks where possible and ensure that your team is well-trained. Resource Allocation: Allocate resources effectively to manage bulk orders. This includes having enough staff, machines, and materials to handle high demand. Communication: Maintain open

Overcoming Common Challenges in Cap Digitizing: Expert Tips from Punch Digitizing Read More »

car vector art

How Do I Prepare My Artwork for Vector Digitizing?

Hey there! If you’re planning to get your artwork digitized for embroidery, you’re in the right place. Preparing your artwork correctly is crucial for ensuring that the final embroidered product looks amazing. At Punch Digitizing, we know how important it is to get this right. Let’s walk through the steps to prepare your artwork for vector digitizing. Understanding Vector Art Before diving into the preparation steps, it’s essential to understand what vector art is. Unlike raster images, which are made up of pixels, vector art consists of paths and points. This means vector art can be scaled to any size without losing quality, making it perfect for embroidery. If you’re new to this, you might want to check out our article on what are the latest trends in vector art digitizing to get some background knowledge. Step 1: Choose the Right Software To create vector art, you need the right software. Popular choices include Adobe Illustrator, CorelDRAW, and Inkscape. These programs offer the tools you need to create precise and scalable vector designs. If you’re not familiar with these tools, many online tutorials can help you get started. Step 2: Start with a Clean Design Your design should be as clean and simple as possible. Remove any unnecessary details that might not translate well into embroidery. Remember, what looks good on a screen might not always look great when stitched on fabric. Simplifying your design helps maintain clarity and quality in the final product. Tip: Use solid shapes and clean lines. Avoid gradients and shadows, as these are challenging to replicate in embroidery. Step 3: Use High-Contrast Colors High-contrast colors make it easier to distinguish different parts of your design. This is especially important for embroidery, where color differentiation can impact the final look. Ensure your design’s colors are distinct and easy to separate. Tip: Choose thread colors that closely match your design colors. This ensures the final embroidered product closely resembles your original artwork. Step 4: Outline Your Design Outlining your design helps define its edges and makes it easier for the digitizer to create accurate stitch paths. Use a contrasting color for the outline to ensure it stands out against the rest of your design. Tip: Keep outlines consistent in width. Irregular outlines can complicate the digitizing process and affect the final result. Step 5: Consider the Size and Placement Think about the size and placement of your design on the final product. Ensure the design is appropriately scaled for the item it will be embroidered on. For instance, a design for a cap will need to be much smaller than a design for a jacket back. Tip: Measure the area where the design will be placed and adjust the artwork accordingly. This ensures the design fits well and looks balanced. Step 6: Save in the Right Format Once your design is ready, save it in a vector format. Common vector file formats include .ai (Adobe Illustrator), .eps (Encapsulated PostScript), and .svg (Scalable Vector Graphics). These formats preserve the paths and points needed for precise digitizing. Tip: Avoid saving your design as a raster file (like .jpg or .png) because these formats don’t retain the scalable qualities of vector graphics. Step 7: Communicate with Your Digitizer Clear communication with your digitizer is key. Provide them with all the necessary details about your design, including the size, colors, and any specific instructions. The more information you provide, the better the final embroidery will match your vision. Tip: Share your design mock-ups and any relevant color codes. This helps the digitizer understand your expectations and replicate the design accurately. Common Mistakes to Avoid While preparing your artwork, be mindful of these common mistakes: Overcomplicating the Design: Too many details can get lost in embroidery. Keep it simple. Ignoring the Fabric Type: Different fabrics react differently to embroidery. Discuss fabric choices with your digitizer. Using Too Many Colors: Stick to a limited color palette to ensure clarity and reduce complexity. Forgetting to Test: Always request a sample or test run to catch any issues before final production. How Punch Digitizing Can Help At Punch Digitizing, we’re here to make the digitizing process as smooth as possible. Here’s how we can assist you: Expert Advice: Our team offers expert advice on how to optimize your design for embroidery. Whether you need help with simplifying your artwork or choosing the right colors, we’re here to guide you. High-Quality Digitizing: We use state-of-the-art software and techniques to ensure your design is digitized with the highest precision. This means your final embroidered product will look sharp and professional. Custom Solutions: Every project is unique, and we provide custom solutions to meet your specific needs. From corporate logos to personal projects, we tailor our services to ensure your satisfaction. Quality Assurance: We conduct thorough quality checks to ensure the final product meets your expectations. Our commitment to quality means you can trust us to deliver top-notch results. Conclusion Preparing your artwork for vector digitizing doesn’t have to be daunting. By following these steps and working with experienced professionals like Punch Digitizing, you can ensure your designs are transformed into beautiful embroidery. Contact us for more information.

How Do I Prepare My Artwork for Vector Digitizing? Read More »

embroidery vector art services

How Is Vector Art Digitizing Used in Embroidery?

Hi there! If you’re curious about how vector art digitizing fits into the world of embroidery, you’re in for a treat. Here at Punch Digitizing, we specialize in transforming your designs into beautifully embroidered masterpieces, and vector art digitizing plays a crucial role in that process. Let’s dive into the fascinating ways vector art digitizing enhances embroidery. The Basics: What Is Vector Art Digitizing? First things first, let’s break down what vector art digitizing is. In simple terms, it’s the process of converting artwork into a digital format that embroidery machines can read. Vector art is perfect for this because it’s made up of paths and points, which can be easily scaled and manipulated without losing quality. This precision is essential for creating detailed and intricate embroidery designs. The Process of Vector Art Digitizing for Embroidery Design Creation It all starts with a design, which can be anything from a company logo to a custom illustration. The design is first created or imported into vector graphic software like Adobe Illustrator or CorelDRAW. This software allows for precise control over the design elements, ensuring every detail is perfect. Conversion to Vector Format If the design isn’t already in vector format, it’s converted at this stage. This step is crucial because vector graphics can be scaled to any size without losing clarity, which is vital for ensuring the embroidery looks sharp and professional. Digitizing the Vector Art The vector design is then imported into embroidery software. This software converts the vector paths into stitch paths, mapping out exactly how the embroidery machine will sew the design. The digitizer can adjust stitch types, directions, and densities to ensure the final product meets the desired quality. Testing and Refining Before the final embroidery is done, a test run is typically performed. This helps identify any issues with the design, such as areas where stitches might overlap or where the fabric might pucker. Adjustments are made as needed to refine the design. Why Vector Art Is Ideal for Embroidery Precision and Detail: Vector art allows for incredibly precise designs, which is essential for embroidery. The ability to control every point and path means that even the smallest details can be captured. This is particularly important for logos and intricate designs where clarity is crucial. Scalability: One of the standout features of vector graphics is their scalability. Whether you need a tiny logo on a shirt or a large design on a jacket, vector art maintains its quality at any size. This flexibility is invaluable for embroidery projects that come in various sizes. Easy Modifications: With vector art, making changes to a design is straightforward. Need to tweak a color or adjust a shape? No problem. These modifications can be done quickly and easily, allowing for rapid iterations and customizations. Applications of Vector Art Digitizing in Embroidery Corporate Branding: Businesses often use embroidery for branding purposes, such as on uniforms, hats, and promotional items. Vector art digitizing ensures that company logos and branding elements are reproduced accurately and consistently, enhancing the professional look of the apparel. Custom Apparel: From sports teams to fashion designers, custom apparel is a big market for embroidery. Vector art digitizing allows for personalized designs that cater to individual tastes and styles. Whether it’s a custom monogram or an intricate pattern, digitizing ensures the design looks flawless. Merchandise and Promotional Items: Embroidered merchandise like bags, hats, and jackets are popular promotional items. Vector art digitizing ensures these items look sharp and professional, making a strong impression on clients and customers. Home Décor: Embroidery isn’t just for apparel. It’s also used in home décor items like pillows, towels, and wall hangings. Vector art digitizing allows for detailed and personalized designs that add a unique touch to home interiors. Special Events: Events like weddings, graduations, and anniversaries often feature custom embroidered items. From monogrammed napkins to personalized gifts, vector art digitizing makes it possible to create memorable and unique items for these special occasions. How Punch Digitizing Enhances Your Embroidery Projects At Punch Digitizing, we take pride in our meticulous approach to future application of vector art digitizing. Here’s how we ensure top-notch quality for your embroidery projects: Expert Digitizers: Our team of expert digitizers has years of experience in converting vector art into flawless embroidery designs. They understand the intricacies of different fabrics and how to optimize stitch types and densities for the best results. State-of-the-Art Software: We use the latest embroidery software to ensure precise and high-quality digitizing. This technology allows us to handle even the most complex designs with ease, delivering results that exceed expectations. Customization and Personalization: We know that each project is unique, and we offer extensive customization options to meet your specific needs. Whether it’s a corporate logo or a custom design, we work closely with you to ensure the final product is exactly what you envisioned. Quality Control: Before any design is finalized, it undergoes rigorous testing and quality control checks. We make sure every detail is perfect and that the embroidery will look great on the final product. The Future of Vector Art Digitizing in Embroidery As technology continues to advance, the future of vector art digitizing in embroidery looks bright. Here are a few trends to watch out for: Automation and AI: Automation and AI are making their way into embroidery digitizing, promising even faster and more accurate conversions. These technologies can analyze designs and optimize stitch paths automatically, reducing the time and effort required. 3D Embroidery: 3D embroidery is gaining popularity, and vector art digitizing plays a key role in creating these dimensional designs. By manipulating stitch densities and directions, digitizers can create stunning 3D effects that add depth and texture to embroidery. Sustainable Practices: Sustainability is becoming increasingly important, and vector art digitizing can contribute to eco-friendly embroidery practices. Digital proofs and virtual samples reduce the need for physical samples, minimizing waste and conserving resources. Conclusion Vector art digitizing is an essential component of modern embroidery, offering precision, scalability, and flexibility. At

How Is Vector Art Digitizing Used in Embroidery? Read More »

vector art for shirts

What Are the Future Applications of Vector Art Digitizing in Various Industries?

Hey there! Ever wondered where the future is heading with vector art digitizing? It’s a fascinating topic, and as a leading provider of digitizing services across the USA, Punch Digitizing is here to give you the scoop. Let’s explore how different industries are set to benefit from the advancements in vector art digitizing. Revolutionizing the Fashion Industry The fashion industry is one of the prime beneficiaries of vector art digitizing. Here’s how: Custom Embroidery: Vector art digitizing plays a crucial role in creating intricate embroidery designs. With precise vector files, machines can stitch detailed patterns on fabrics, enhancing the quality and appeal of garments. This precision is essential for high-end fashion brands that demand perfection. Pattern Making: Designers can use vector art to create and modify patterns easily. This flexibility allows for quick adjustments and customizations, catering to the ever-changing fashion trends. The ability to rapidly iterate on designs ensures that fashion brands can keep up with the fast-paced industry. Sustainable Fashion: As the industry shifts towards sustainability, vector art digitizing helps minimize waste. Digital patterns can be tested and perfected virtually before any material is cut, reducing fabric wastage. This not only saves costs but also aligns with eco-friendly practices. Enhancing Marketing and Advertising Marketing and advertising rely heavily on visuals, and vector art digitizing is becoming increasingly important in this sector. Here’s why: Scalable Graphics: Vector art can be scaled infinitely without losing quality, making it perfect for creating logos, banners, and other marketing materials that need to look sharp at any size. Whether it’s a small business card or a huge billboard, vector graphics maintain their clarity. Interactive Content: The future of marketing lies in interactive content. Vector art digitizing allows for the creation of engaging, interactive graphics that can be used in digital marketing campaigns. Think interactive infographics, dynamic web banners, and engaging social media posts. Augmented Reality (AR): Vector art can be integrated into AR experiences, providing an immersive way for brands to engage with their audience. Imagine a customer pointing their phone at a product and seeing a detailed, animated vector graphic come to life, explaining features and benefits. Transforming Education Education is another field where vector art digitizing is making significant strides. Here’s how it’s changing the game: E-Learning Materials: Vector art is used to create clear, concise, and visually appealing educational materials. These materials are essential for e-learning platforms that rely on engaging content to keep students interested. Interactive Diagrams: Vector graphics are ideal for creating interactive diagrams and illustrations. These can be used in subjects like biology, geography, and engineering to provide students with a hands-on learning experience. Interactive diagrams help in breaking down complex concepts into understandable visuals. 3D Models: With advancements in 3D vector art, educational institutions can create detailed 3D models for various subjects. Whether it’s a model of the solar system or an anatomical representation of the human body, 3D vector art enhances the learning experience. Impacting the Gaming Industry The gaming industry is continuously evolving, and vector art digitizing is playing a pivotal role in its development. Here’s how: Game Assets: Vector art is used to create game assets like characters, backgrounds, and objects. The scalability of vector graphics ensures that these assets look great on any screen size, from smartphones to large monitors. Animation: Vector graphics are perfect for creating smooth animations. In gaming, where fluid motion is crucial, vector art ensures that characters and environments move seamlessly. Virtual Reality (VR): As VR becomes more mainstream, vector art is used to create immersive environments. The precision and scalability of vector graphics make them ideal for detailed VR experiences, enhancing the overall gameplay. Advancing Architecture and Engineering Vector art digitizing is also making waves in architecture and engineering. Here’s how: Blueprints and Schematics: Vector graphics are used to create detailed blueprints and schematics. These precise drawings are essential for construction projects, ensuring that every detail is accurately represented. 3D Renderings: Vector art can be used to create 3D renderings of architectural designs. These renderings provide a realistic view of the project, helping architects and clients visualize the final outcome. CAD Integration: Vector art is easily integrated with Computer-Aided Design (CAD) software. This integration allows engineers to create detailed technical drawings and models, streamlining the design process. Boosting the Print Industry The print industry continues to thrive with the help of vector art digitizing. Here’s how: High-Quality Prints: Vector art ensures that printed materials are of the highest quality. Whether it’s business cards, posters, or brochures, vector graphics maintain their clarity and sharpness. Custom Printing: The ability to create custom vector designs allows for personalized printing solutions. Clients can have unique, tailor-made designs for their printing needs, from personalized stationery to custom packaging. Eco-Friendly Printing: With digital proofs and virtual samples, the print industry can reduce its environmental impact. Vector art digitizing helps in minimizing waste by perfecting designs before they go to print. Streamlining Product Design and Manufacturing Product design and manufacturing benefit immensely from vector art digitizing. Here’s how: Prototyping: Vector art is used to create detailed prototypes of products. These prototypes can be tested and refined before mass production, ensuring that the final product meets all specifications. Laser Cutting and Engraving: Vector files are essential for laser cutting and engraving processes. The precision of vector graphics ensures that the cuts and engravings are accurate, resulting in high-quality products. Customization: Vector art allows for easy customization of products. Manufacturers can offer personalized products that cater to individual customer preferences, enhancing customer satisfaction. Conclusion The future applications of vector art digitizing are vast and varied, impacting numerous industries in innovative ways. At Punch Digitizing, we’re excited about these advancements and how they can benefit our clients across the USA. Contact us whether you’re in fashion, marketing, education, gaming, architecture, print, or manufacturing, vector art digitizing has something to offer.

What Are the Future Applications of Vector Art Digitizing in Various Industries? Read More »

vector art digitizing

The Latest Trends in Vector Art Digitizing

Hey there! If you’re curious about the latest trends in vector art digitizing, you’ve come to the right place. As a top provider of digitizing services across the USA, Punch Digitizing is always on the lookout for what’s new and exciting in our field. Let’s dive into some of the coolest trends shaking up the world of vector art digitizing. AI and Machine Learning: The Game Changers AI and machine learning are revolutionizing how we create and digitize vector art. Imagine this: AI algorithms can now look at raster images and magically (okay, not really magic, but close) convert them into vector formats. This tech saves so much time and effort, especially for big projects that need super high precision. It’s like having a super-smart assistant who never sleeps. Next-Level Software The software we use for vector art digitizing keeps getting better and better. Here are some awesome features you can expect: Automated Tracing: This feature automatically turns raster images into vectors with hardly any manual work. It’s like having a shortcut that actually works. Better Color Management: Ensures the colors in your digital designs look just as fabulous when printed. Cloud Integration: Work from anywhere and collaborate easily with your team. Perfect for those of us who can’t sit still in one place for too long. 3D Vector Art is Here Ever thought about vector art in 3D? It’s a thing now, and it’s huge in gaming, virtual reality, and augmented reality. With 3D vector art, you can create graphics that pop out and interact with users in exciting ways. Think detailed 3D models that you can spin around and look at from every angle. Cool, right? Personalization is Key These days, everyone wants something unique. Whether it’s for branding, merchandise, or just personal projects, people are after custom designs that scream “me.” At Punch Digitizing, we love creating personalized vector art that fits exactly what our clients are looking for. It’s all about those special touches that make a design truly yours. Going Green Eco-friendly practices are becoming a big deal in vector art digitizing. Companies, including ours, are finding ways to be kinder to the planet. This might mean using digital proofs instead of paper or cutting down on waste during the digitizing process. It’s all about doing our bit for the environment while still delivering top-notch work. Tech Integration Vector art digitizing is hooking up with other technologies like laser cutting, CNC machining, and embroidery. This means you can use vector art in more ways than ever. For instance, using vector art digitizing in embroidery  can make your designs more precise and detailed. Perfect for fashion and textiles! User-Friendly Tools The tools we use are getting easier and more intuitive. Whether you’re a newbie or a pro, modern software makes it simpler to create amazing vector art. Plus, with tons of tutorials and awesome customer support, there’s always help when you need it. Wrapping Up Vector art digitizing is constantly evolving, and these trends are just the tip of the iceberg. Staying on top of these changes helps us at Punch Digitizing provide the best possible service to our clients. Contact us, Whether you need custom vector art, 3D designs, or integration with other tech, we’ve got you covered.

The Latest Trends in Vector Art Digitizing Read More »

New trends in digitizing

Trends in 3D Puff Embroidery – New 3D Embroidery Ideas

The world of embroidery is constantly evolving, with new trends and techniques emerging regularly. 3D puff embroidery, known for its eye-catching and tactile appeal, is no exception. Staying updated with the latest trends can inspire your projects and keep your designs fresh and contemporary. In this blog, we’ll explore the current trends in 3D puff embroidery and how Punch digitizing incorporate it in  our work. Bold and Vibrant Colors One of the most noticeable trends in 3D puff embroidery is the use of bold and vibrant colors. Designers are increasingly experimenting with bright hues to make their designs pop. Neon colors, in particular, have gained popularity for their striking and modern look. These vivid colors enhance the three-dimensional effect of the embroidery, making it more eye-catching and dynamic. When incorporating this trend into your projects, consider the overall aesthetic and purpose of the design. Bold colors can be particularly effective in fashion items like hats and jackets, where they can make a strong style statement. Mixing Textures Another exciting trend is mixing different textures within a single design. Combining 3D puff embroidery with other embroidery techniques, such as flat stitching or appliqué, creates a rich, multi-dimensional effect. This approach adds depth and interest to the design, making it more visually appealing. To achieve this, you can use various types of threads and materials. For example, combining matte and metallic threads can create a unique contrast, while using different fabric types for appliqué can add an extra layer of texture. Personalized and Custom Designs Personalization continues to be a significant trend in embroidery, and 3D puff embroidery is no exception. Customers love the ability to create custom designs that reflect their personality, interests, or brand identity. This trend is particularly prominent in products like caps, bags, and jackets, where personalized initials, names, or logos are popular. For businesses like Punch Digitizing, offering personalized 3D puff embroidery services can be a great way to attract clients looking for unique and custom designs. Ensure you have a process in place to accommodate personalized orders efficiently. Eco-Friendly Materials As sustainability becomes increasingly important, the use of eco-friendly materials in 3D puff embroidery is on the rise. Designers are opting for organic and recycled threads, biodegradable foams, and natural fabrics to reduce their environmental impact. This trend not only appeals to environmentally conscious consumers but also contributes to a more sustainable industry overall. Incorporating eco-friendly materials into your projects can set your work apart and attract a broader audience. Highlighting your commitment to sustainability can also enhance your brand’s reputation. Minimalist Designs While bold and vibrant colors are trending, minimalist designs are also gaining traction. Clean, simple designs with minimal detailing can create a sophisticated and modern look. This trend is perfect for those who prefer understated elegance over intricate patterns. To achieve a minimalist look, focus on clean lines, geometric shapes, and a limited color palette. This approach works well for corporate branding and fashion items that require a sleek and professional appearance. Pop Culture and Nostalgia Pop culture and nostalgia are powerful influences in design trends, and 3D puff embroidery is no exception. Designs inspired by popular movies, TV shows, music, and retro styles are highly sought after. These designs resonate with consumers on a personal level, often evoking fond memories and emotions. Incorporating pop culture references into your embroidery projects can be a fun and engaging way to attract a younger audience. Ensure you have the necessary permissions and licenses when using copyrighted material. Digital Influence The digital age continues to shape trends in all areas of design, including embroidery. With the rise of social media, there’s a growing demand for designs that look great both in person and on digital platforms. High-contrast, bold designs that photograph well are particularly popular. Consider how your 3D puff embroidery designs will appear in photos and videos. Ensuring your work is visually striking in digital formats can help you gain traction on platforms like Instagram and Pinterest. Technological Advancements Advancements in embroidery technology are continually pushing the boundaries of what’s possible with 3D puff embroidery. New embroidery machines and software offer enhanced precision, more design options, and greater efficiency. Keeping up with these technological trends can help you stay competitive and deliver high-quality results. Investing in the latest equipment and software can improve your workflow and expand your creative possibilities. Regularly updating your skills through training and workshops can also help you make the most of these advancements. Conclusion Staying updated with the latest trends in 3D puff embroidery can inspire your projects and keep your designs relevant. Whether you’re experimenting with bold colors, mixing textures, or embracing eco-friendly materials, incorporating these trends can elevate your work. As the industry evolves, embracing new ideas and technologies will help you stay ahead and continue to create stunning, innovative designs.

Trends in 3D Puff Embroidery – New 3D Embroidery Ideas Read More »