February 2021

Free Embroidery Fonts for Designers | PunchDigitizing

Discover the Best & High-Quality Embroidery Fonts for Your Designs

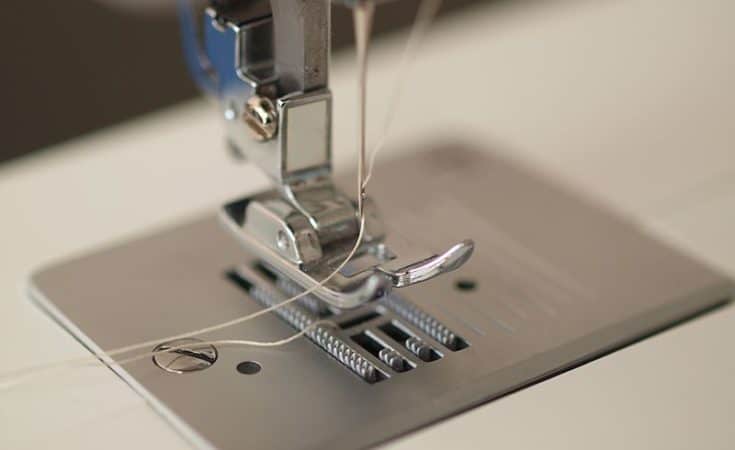
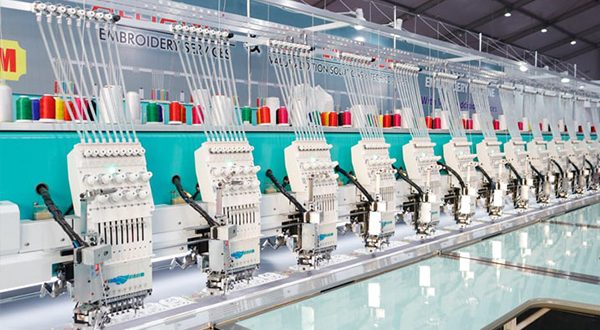
People in business, brands and specially graphics designers convey information to the audience using design. The font is the crucial element in design and plays a vital role in sharing information and attracting more customers to design or business. The graphic designer creates the design that he wants to put on fabric before making embroidery on anything like a hat, shirt, trousers and sweaters. Mostly design created on Computer. The designer tries to use different font before getting to an appropriate font that fits his style. In this modern-day and time, we have compiled a list of some excellent free embroidery fonts best for designers. Want Stunning Fonts for Your Digitizing Project? Elevate your embroidery digitizing projects with our stunning font library! Create embroidery designs that stand out with our high-quality fonts. Contact Now Zigzag Fonts The letters are generated using zigzags, just like the name. It is perfect for different designs and interesting thing is it is available for download. Christmas Jumper Font For Christmas and holiday designs, most designers typically struggle with font selection. But this font is ideal for all designs for cards and other items related to Christmas. KBA Stitch in Time Font This font looks like it has been stitched. You can change this font by changing programs, and the font can be downloaded. DJB Monogram Font Pretty popular are the DJB monogram fonts. it is beautiful and unique, due to this many designers use this font. Because of curly nature it brings a whole new level of attention and attraction to design VTKS Font Embroidery This font is not curly or twisted. It looks like a regular text but normally comes in block letters. The first letter has a different color from the other alphabets. Embroideries The embroidery font is made of little “x” linked to form each of the letters. Although zigzag fonts consist of zigzag fonts, these two fonts also share the similarity of making letters from anything. Embroidery by Kingthings This font is not so famous, but it’s unique and beautiful. Alphabets come with curves that can also be called caps. The font is made more distinctive by these caps and it is fitting to put embroidery designs on shirts. Chubby Trail Font Since it is downloadable and has a great look, many designers use chubby trail font. To shape alphabets, dots are beautifully and neatly connected. PWBroderie Font This is a cool, lovely, and exclusive font. Over and under the letters, it has dots, curves, and shapes. It is an apt font for template headings and topics. Monsterfreak Font This font looks terrifying and freaky, much like the word. The letter O has the face of a monster painted on it. For Halloween theme parties, this font is great for Halloween designs.   Conclusion In conclusion, choosing the right font is essential for creating embroidery designs that not only stand out but also reinforce the branding of your business or clients. Contact Punch Digitizing, we understand how crucial fonts are in conveying the right message and enhancing the overall look of your embroidery projects. With a wide selection of free embroidery fonts available, you can ensure that your designs reflect your brand’s personality and attract your target audience. Whether you’re working on a playful design, a professional project, or something seasonal, using high-quality embroidery fonts free helps elevate your work and ensures every stitch aligns with your branding vision.

Discover the Best & High-Quality Embroidery Fonts for Your Designs Read More »

Secrets of Embroidery | Embroidery Tips | PunchDigitizing

Secrets of Embroidery

In this post, I am focusing on simple ways to improve your embroidery. I hope sharing these secrets of embroidery will help you. 1. Choosing the best fabric Fabrics make the stitches irregular and uneven with an uneven weave. I have lovely linen that I purchased a couple of years ago from Joanne’s when I wanted to get a feel for what kinds of fabrics fit best. The weave is very irregular and very loose. So I’d wonder why all my stitches looked so uneven and not clean every time I embroidered it! 2. Choosing the best embroidery hoop They are not all hoops of the same quality! Make sure that the inside and outside ring sit nicely together when shopping for embroidery hoops. If you can spend a little more cash on one item, I recommend that you get a premium embroidery hoop. Stay Home Hoops Stitches are amazing, and the hoops are highly recommended. 3. Stencil your design on the fabric before you get started stitching. To trace your template or a water-soluble stencil, I suggest using a water-soluble marker. Before you get started, it is so important to have a durable design drawn on the fabric. I’ll wing it occasionally and freehand and embroidery, but it never looks as fair. Like everything else in life, before you start, it is essential to have a little blueprint or plan in place! 4. Set your fabric, hoop, and stitches This makes the fabric ripple, and we all know Hoop Art looks crisp and clean when the fabric is good, even, and smooth in the hoop! Focus on stitches that are not too tight but snug. You may use fabric that is too thin. If you’re using thinner thread, I suggest using an embroidery stabilizer on the piece’s back. If something like clothing is embroidered on you, I can’t recommend this enough to use an EMBROIDERY HOOP. Ensure that the fabric is uniformly pulled through the hoop and that the hoop screw is secure before you put one stitch into the fabric. 5. Pay attention to stitch length This happens to me so often whenever I am in a hurry. Slow down and be fully aware of where you’re stitching. If your fabric having a more visible weave, then pay attention to your stitches. Try to ensure the length of your stitches is all the same when you are tired or irritated. Take a break and return to the work. 6. Have a seam ripper on hand You will make mistakes, and using a seam ripper is a lot better than using scissors. I’ve certainly created a hole accidentally with a scissor in the cloth, and it’s less likely that a seam ripper will happen!

Secrets of Embroidery Read More »

Why Needle Breaks Occur in the Caps & Tips to Prevent Needle Breaks

Why Needle Breaks Occur in the Caps & Tips to Prevent Needle Breaks

Either you have an older or new version of the cap digitizing machine, but the digitizing method will stay the same. The machine you’re using can vary. For decades, we have been providing embroidery digitizing services of all kinds to our clients at Punch Digitizing. We know the ins and outs of the digitization of caps. In this post we’re talking about the needle breaks in the caps in this post. Why needle breaks occur? What are the factors that cause needle breaks? In what conditions do needle breaks happen? What are the options and precautions? And what would you do to deal with the situation? Why Needle Breaks Occur 1. The fabric is too tough: Did you ever try to embroider a fabric and just keep losing your needle? Remember that the fabric may be too tough for your chosen needle! By applying heat or spraying water on the front of the cap, try softening the fabric. To soften the fabric, many embroiderers get inventive and use heat from a steamer or heat press. As it makes the fabric soft and easy to penetrate, this tip works well for rough, structured caps. It’s also necessary that you pick the right needle you’re going to get to in the next segment. 2. Using the wrong type of needle Different fabrics require different needle types. Ballpoint needles, for example, work best on thin, stretchy cloth, and if you try to sew on heavy material, such as caps or corduroy, they can also break. The majority of embroidery projects call for sharp point needles of 75/11. However, try using a different form of needle to fix the issue if you typically have a needle breaking problem. For tough materials trying titanium needles that appear to be more suitable. You can also use titanium-coated needles on standard cloth, as they are designed to last longer than your typical needle. 3. Cap driver is too high Usually, needle breakage occurs when embroidering on hats, . This is because of their round surface and uncommon shape. In embroidery, our purpose is to make the fabric as flat as possible. It will also be beneficial to lower the cap driver to reduce the distance between the cap and the needle plate. This decreases flagging, which is what usually enables needle splits to have caps. If there is too much distance between the cloth and the needle plate, flagging occurs as the needle penetrates through the fabric, causing the material to bounce up and down. This induces bending and inevitably splitting the needle. The needle has a greater chance of flexing (bending) and missing the needle hole with space. It will hit the plate and split if the needle misses the needle hole. Tips to Prevent Needle Breaks 1. Avoid pulling the fabric This is an error often made by professional home sewers because they are experienced and distracted by music, the internet, or TV, and when the machine complains, they do not hear. If it is working too hard or something is misaligned, the sound of the machine tells you. Skip stitches, a bent, or a broken needle will result from pulling the thread. 2. Clean your computer for sewing It is recommended by experts that should clean your machine once a month. In reality, it depends on how often you use it and the type of fabric you’re using. If you use the sewing machine a lot, you may have to clean it more often. Materials like felt and fleece can drop short fibres under the feeding plate and clog the field. Clean it daily to enjoy your sewing experience better and extend the life of your embroidery machine. 3. Regularly check the needle If you remember the movie “The Usual Suspects,” you can understand the analogy. At the end of the movie, the little crooked man, the mess’s mastermind, becomes the smart, self-confident shiny suit. The needle in this example is an unusual perpetrator. Before we blame the blunt and twisted little thing at the end of the shaft, we blame the friction, timing, fabric, and even the thread, when the issue can be rectified much of the time by switching to a good quality needle. Change the needle, mainly when thick or sequined fabrics are sewn. For the fabric you’re working on, use the necessary needle and thread.

Why Needle Breaks Occur in the Caps & Tips to Prevent Needle Breaks Read More »

cheap embroidery machines 2024

Best Cheap Commercial Embroidery Machines in 2024

Whatever you’re going to buy, budget is the main factor that you should consider. you may feel hesitate to spend too much money especially when spend money on your hobbies. I have tested the 5 cheap embroidery machines for you to fix your troubles. They are flexible and charming, even though their prices are low. You can choose them when you are searching for the cheap embroidery machine for yourself. 2024 Best Cheap Embroidery Machines: Here are the impressions and comparisons of 2024’s top low-cost embroidery machines. 1. Brother SE600 Our first cheap embroidery machines is Brother SE600. Bear in mind that this is also a standard, full-featured sewing machine that includes eight buttonhole types and 103 different stitches. You have a 6.4″(W) x 4.1″(H) workspace for embroidery, which is plenty of room when you are just getting started. It takes re-hooping and continuous synchronisation to work with different designs. On 4 x4 embroidery machines, it is still one of the boring assignments. The integrated alignment that makes re-hooping hassle-free is given to you by SE600. You can edit curved text, despite being a budget computer, and shift your designs around on the screen. Before stitching on the 3.7-inch smart, colour, touch screen, you can also preview your design changes. 80 non-licensed, decorative designs and six lettering fonts are included in this model. For a beginner, that is more than enough. But if that’s not enough, via the built-in USB port on your machine, you can import PES designs from your computer. 2. Brother PE525, PE540D, and PE800 The Brother PE525 and the Brother PE540D, based on their main features, look like the same computers. The only true difference is that with your order, with the PE540D, you get 35 accepted Disney models. On each of these units, there is an LCD touchscreen display on which you can watch tutorials and work with the designs. All models allow for the rotation of a pattern of 1, 10, or 90 degrees from the original. From the PE525 to the PE540D, device communication is the same. There is also a memory card on both of these two versions. These things are handled a little differently by the PE800. It has a built-in memory in which designs can be processed. To move information instead of a USB cable, you use a memory stick (thumb drive) slot. 3. Janome Sewing Machine 2212 This is, as an alternative to the Singer and Brother. Janome manufactures some powerful and inexpensive sewing machines, like 2212. They make cheaper ones, but the quality is not quite as good, so because of the simple dial range where you can pick from the 12 built-in stitches, we have chosen this one. You can choose from several width and length adjustments, making it easy to use, and there is also a drop feed feature that opens up many different projects, such as quilting. There are 4 stage buttonholes and a tray that is tucked away, to keep your intricate accessories out of the way. You can get up to 1,000 stitches a minute at full speed and there’s an easy free arm to use. Janome includes a 25-year limited warranty, while it always seems durable enough to last without any issues, it’s still nice to have one just in case. 4. Singer 1507WC When looking for a cheap sewing machine, you want to know that it’s not going to be hard to use. This is one of the large advantages of Singer’s 1507WC. Rapid threading, known for its simple setup, means you can spend more time sewing and less time struggling to thread. You can adjust the stitch length and choose from 8 built-in stitches to open up loads of sewing options and switch between the 4 easy-to-snap-on presser feet. For crafts, fashion sewing, home decorating, and a lot more, you can use this unit. The canvas cover prevents it from accumulating dust while in storage and the removable free arm makes it easy to stitch sleeves for you. There is ample storage built-in for your smaller accessories and an automatic bobbin weaving clutch. It’s a little heavier, weighing 13 pounds, than some of your other options, but this is part of what makes it a solid and powerful sewing machine. 5. RLB6800 brother This is the lowest-price embroidery unit. Even though you have a small budget, you can afford it. Although the device’s cost is low, the features are flexible and simple to use. It has a compact and lightweight body on one side. So, it’s easy for you to get out of here. You’re not going to feel too much pressure, whether you want to go to the class or take it to connect with other fans. In addition, through its USB connectivity, you can also import more designs that you like. In addition, given that most individuals who buy this computer are beginners, the manufacturer has previously installed the tutorial in the unit. You can only complete your work by following the directions step by step. The most eye-catching aspect of the RLB6800 is an LCD touch screen that allows you to view and modify your designs.

Best Cheap Commercial Embroidery Machines in 2024 Read More »

How Many Types of Hand Stitching Embroidery | PunchDigitizing

Different Types Of Hand Stitching

Garment making was performed entirely by hand before the sewing machine. However, few garments are produced completely by hand today in the presence of advanced sewing machines and sergers. Many custom-made and home-sewn garments continue to use some form of hand stitching mainly as finishing techniques. Understanding and knowing the correct stitch to use is necessary for the appearance of the piece. Sewn by hand or machine, there are many types of hand stitching embroidery. For hand-sewing stitches, here are some instructions on how to achieve basic stitches for all your sewing projects. These methods of hand stitching and machine stitching can help direct you, whether you are a novice or a professional sewer, through your designs. Types Of Hand Stitching: 1. Running stitches: The long, straight stitch is a running stitch, often referred to as a basting stitch. This stitch is commonly used as a basting stitch, meaning it will tie two pieces of fabric together temporarily and can be removed later easily. Procedure From the wrong side, insert your threaded needle upward. Insert it into the fabric in accordance with the marked pattern. Bring back up the thread and repeat. 2. Backstitch: It is a simple embroidery stitch that produces a line of stitches without a break between them. It looks like a continuous line with a straight thread. Procedure Take a small stitch, work from left to right, At the end of the previous stitch, then insert the needle, taking it out to the point where the thread emerges. Continue, placing the needle at the end of the previous stitch at all times. 3. Catch stitch: It is invisible on the right side of the fabric due to this it suitable for blind hems. This catch stitch is taken up by a zig-zag pattern. The catch stitch is a perfect flat stitch technique for seaming two pieces of fabric with a slight overlap. Procedure Take small stitches from the hem when working from left to right. Take a tiny stitch on a garment. 4. Slip stitch: An often invisible seam is created by the slip stitch and is a good stitch for hemming. Using a colour of thread similar to that of the object and the fabric will blend into the seam. Procedure Pull the needle through the hem’s fold. At the same time, pick up a thread of cloth. Make the stitches separate and reasonably loose by around 1/2 inch. 5. Blanket stitch: A decorative seam-finishing technique that is intended to be noticeable is the blanket stitch. This stitch is commonly used as finish the edges of pillows or quilts. Procedure Insert the needle from back to front into the fabric 1/8 of an inch from the edge, securing the thread on the wrong side of the fabric. Wrap around the working head behind the end of the needle’s eye, then behind the point. Pull through the needle, taking the knot to the edge of the fabric. Continue, having the knot and stitches closely spaced. 6. Whipstitch: It is a simple seaming technique. Whipstitch consists of a line of short diagonal stitches which is invisible on the right side of the fabric. Procedure Thread your needle, and at the end of the thread, tie a knot. From the underside of the fabric and up through the top, feed the needle and hide the knot. When operating with the two edges of the fabric together with the wrong sides of the fabric facing each other, carefully thread short diagonal stitches around the seam.

Different Types Of Hand Stitching Read More »

Things to Consider Before Choosing Embroidery Service Near Me

Things to Consider Before Choosing Embroidery Service in USA

Embroidery has the power to transform a simple piece of fabric into something memorable—whether it’s a branded company uniform, personalized merchandise, or a unique piece of art. But how do you ensure your project comes out perfectly? The key lies in choosing the right embroidery service. At Punch Digitizing, we’ve worked with countless embroidery projects, from small businesses to large-scale orders. Here are the crucial things you should consider when selecting an embroidery service in USA to make sure you get results that exceed your expectations. Quality is Everything When it comes to embroidery, quality can’t be compromised. The difference between a great embroidery service and a mediocre one is in the details—clean stitches, vibrant thread colors, and a finish that holds up after washing. You don’t want to end up with loose threads, inconsistent stitching, or fading designs. How can you be sure about quality? Always ask to see samples of the service’s previous work. Whether it’s a logo, a complex design, or intricate lettering, high-quality embroidery should look neat and professional. If the service offers digitizing, even better! This ensures your design is translated precisely from digital to fabric. Experience Brings Expertise Experience in the embroidery business is an essential ingredient for success. A service with years of practice knows how to handle a wide range of fabrics, stitching techniques, and design challenges. If you’re working with special materials or intricate designs, experience matters. Choosing an embroidery provider with a strong track record will save you from potential headaches. It’s not just about stitching; an experienced team can offer helpful advice on what works best for your specific project, helping you avoid common pitfalls. Look for a Service that Fits Your Needs Not all embroidery services are the same, and some are better suited for certain projects than others. Some specialize in custom apparel, while others focus on large-scale corporate orders or intricate personal designs. Understanding what services they offer is key to making sure they can handle your order—whether it’s a simple monogram or a detailed logo with multiple colors. It’s always a good idea to ask whether they offer additional services, like digitizing. Digitizing is the process of converting your design into a stitchable file, which is crucial for achieving the perfect final product. Some embroidery services also offer custom design work, allowing you to tweak your concept before it hits the machine. Don’t Underestimate Turnaround Time Got a tight deadline? Whether you’re ordering embroidered uniforms for a company event or promotional items for a product launch, turnaround time can be a make-or-break factor. Some services can deliver fast, but speed shouldn’t come at the expense of quality. Before committing, ask the service about their usual turnaround time and if they can meet your deadline without cutting corners. Some companies offer rush services, but always make sure to clarify if this option impacts the quality of the final product. Transparent Pricing is Key Embroidery pricing can vary depending on factors like design complexity, thread colors, and the number of stitches involved. Hidden costs can sneak in if you’re not careful—setup fees, digitizing costs, or extra charges for larger designs. To avoid surprises, request a detailed quote upfront. A transparent embroidery service will happily break down the costs for you and explain how they calculate pricing, whether it’s based on stitch count, design size, or thread color. Keep in mind that while it’s tempting to choose the cheapest option, price should always align with the quality you expect. Communication is Crucial When working on a custom project, good communication can make all the difference. A service that listens to your needs, answers your questions, and keeps you updated throughout the process is one worth choosing. Miscommunication or lack of attention can result in incorrect designs, wrong colors, or disappointing results. Look for a provider that is easy to reach, responsive, and willing to discuss your project in detail. Having someone walk you through the process or offer design feedback ensures that the final product meets your expectations. Reviews Speak Volumes Nothing gives you better insight into a company’s performance than reviews from previous customers. Take the time to search for reviews on Google, social media, or other third-party platforms to see how the embroidery service fares in terms of quality, customer service, and reliability. Were customers happy with their finished products? Did the company meet deadlines? Were there any issues with design execution? Reviews often reveal details that can help you decide whether this is the right service for you. Location and Shipping Flexibility While many top-notch embroidery services operate across the USA, considering the location can play a role if timing is crucial. Local services can sometimes offer quicker turnaround, as you eliminate potential shipping delays. However, many high-quality providers offer reliable nationwide shipping, so don’t hesitate to choose a non-local company if they meet your needs. Always ask about shipping options, especially if you need to get products delivered by a specific date. Some companies offer free or discounted shipping for larger orders, so it’s worth checking if that’s an option. Sustainable and Ethical Practices More and more people are considering the environmental impact of their purchases, and embroidery services are no exception. If sustainability is important to you, check whether the service uses eco-friendly materials, follows sustainable practices, or offers ethically sourced threads. Many embroidery providers now offer organic fabrics or use processes that minimize waste. If you’re interested in sustainability, make sure to ask the service about their environmental practices before making a decision. Conclusion: Choose Wisely for Embroidery Success Choosing an embroidery service in the USA can be a game-changer for your project, whether it’s a single custom T-shirt or a large bulk order. Focus on finding a provider that offers the quality, experience, and communication you need to get the job done right. Contact Punch Digitizing, we make sure every stitch is perfect. Whether you need custom designs, quick turnaround, or expert digitizing services, we’re here to make your embroidery

Things to Consider Before Choosing Embroidery Service in USA Read More »

What Is Embroidery? | Embroidery Definition and History

Embroidery Definition – More Than Just Thread and Fabric

Embroidery—what comes to mind? Maybe you picture an old-fashioned technique used for monograms on towels or logos on uniforms. While those are classic examples, embroidery is so much more than simply stitching fabric. At its core, it’s an art form that has evolved over centuries, blending tradition with innovation. So, what’s the true embroidery definition? Let’s dive with Punch Digitizing into the meaning, history, and why this timeless craft still captures imaginations today. What Is Embroidery? Simply put, embroidery is the craft of decorating fabric or other materials using a needle to apply thread or yarn. But calling it “decorating with thread” doesn’t do justice to the intricate, often breathtaking designs embroidery can create. From simple initials to complex, hand-stitched masterpieces, embroidery transforms ordinary fabric into something extraordinary. The word “embroidery” itself comes from the Old French word “broderie,” meaning embellishment. And that’s exactly what embroidery does—it embellishes, elevating plain materials into personalized, artful creations. The Basic Definition At its most basic, embroidery involves: Needle: The tool used to pull thread through fabric to create stitches. Thread or Yarn: The material used to create the design. This can vary from traditional cotton floss to metallic or silk threads. Fabric: The surface where the embroidery takes place. While most embroidery is done on fabric, it can also be done on other materials like leather, paper, or even wood. But within this simplicity lies an art form that has been evolving for thousands of years. A Timeless Art: The History of Embroidery Embroidery has been practiced for centuries in cultures across the world, from ancient Egypt and China to medieval Europe. In fact, the earliest known examples of embroidery date back to around 30,000 B.C., where fossilized remains of embroidered clothing were discovered in Russia. Historically, embroidery was not only decorative but a marker of status. Royalty and nobility wore heavily embroidered garments, with gold and silver threads often used to signify wealth and power. In different regions, specific types of embroidery, like Chinese silk embroidery or European tapestry work, became known for their intricate craftsmanship and unique styles. Today, embroidery is no longer reserved for the elite; it’s a craft accessible to everyone, blending tradition with modern technology. Modern Embroidery Defination: From Hand to Machine While hand embroidery is still widely practiced, modern embroidery also includes machine embroidery. This is where technology steps in to simplify and speed up the process, making it easier to replicate designs with precision. Hand Embroidery: Involves carefully stitching designs by hand, one thread at a time. Hand embroidery gives each piece a personal, unique touch, with subtle variations that make each design special. Machine Embroidery: Uses automated machines to stitch designs onto fabric. Machine embroidery is ideal for creating consistent, high-volume designs, like logos or patterns for clothing brands. At Punch Digitizing, we combine the art of embroidery with the precision of technology, turning your designs into custom digitized files that machine embroidery can bring to life. Embroidery Stitches: More Than Just Thread To truly understand embroidery, you have to look at the stitches that make up each design. There are dozens of stitch types, each with its own unique texture, look, and purpose. Some of the most common embroidery stitches include: Running Stitch: A basic stitch often used for outlines. Satin Stitch: Fills in areas with smooth, closely placed stitches, creating a polished surface. Backstitch: Provides a neat, continuous line, often used for writing text in embroidery. French Knot: Adds dimension and texture with small, raised knots. Cross Stitch: A popular counted-thread stitch that forms an “X” on the fabric. Each of these stitches serves a different purpose in creating a design, and mastering them is part of the joy of embroidery. Whether hand-stitched or machine-made, the careful choice of stitch impacts the final look and feel of the piece. Embroidery as an Expression of Creativity At its heart, embroidery is more than just a craft—it’s a way to express creativity. Whether you’re stitching a simple monogram onto a shirt or designing an intricate floral pattern, embroidery lets you bring your ideas to life in a tactile, lasting way. Even in today’s fast-paced world, embroidery remains relevant. From fashion designers incorporating embroidered elements into high-end couture, to hobbyists creating handmade gifts, the possibilities are endless. Embroidery has moved beyond its traditional role as decoration—it’s become a form of personal and artistic expression. Embroidery Trends: Where Tradition Meets Innovation In recent years, embroidery has surged in popularity, especially as a DIY craft. Thanks to social media platforms like Instagram and Pinterest, there’s a growing community of embroiderers sharing their work and inspiring others to pick up a needle and thread. Some of the latest trends in embroidery include: 3D Embroidery: Using techniques like 3d puff embroidery or layered stitches to create a three-dimensional effect. Appliqué Embroidery: Combining fabric pieces with embroidery to add texture and layers to the design. Minimalist Embroidery: Simple, clean designs that focus on outlines and subtle details, perfect for a modern aesthetic. Sustainable Embroidery: Using eco-friendly materials like organic cotton thread and upcycled fabrics to create conscious designs. With modern tools and technology, embroidery has become even more versatile. For example, businesses use embroidery to brand corporate apparel, and individuals create personalized gifts that leave a lasting impression. Conclusion: Embroidery—A Craft that Endures So, what is embroidery? It’s the art of decorating fabric with thread, but more importantly, it’s a craft that has stood the test of time. From ancient hand-stitched designs to modern machine-made logos, embroidery continues to captivate people around the world. Whether you’re diving into embroidery as a hobby or looking for professional results for a business or event, embroidery offers a unique, creative way to make a statement. Contact Punch Digitizing, you can bring your vision to life with precision and artistry.

Embroidery Definition – More Than Just Thread and Fabric Read More »

How to Avoid Common Mistakes When Designing a Custom T-shirt | PunchDigitizing

How to Avoid Common Mistakes When Designing A Custom T-Shirt!

Designing a custom T-shirt can be a fun and creative process, but it’s easy to make mistakes along the way that could ruin the final product. Whether you’re creating T-shirts for personal use, business branding, or an event, getting the design right is key. With a few simple tips, you can avoid common pitfalls and make sure your custom T-shirt turns out exactly how you envision. At Punch Digitizing, we help you bring your custom T-shirt designs to life, ensuring your vision translates perfectly to fabric. Here’s how to avoid the most common mistakes people make when designing custom T-shirts. 1. Not Choosing the Right Fabric The fabric you choose for your custom T-shirt makes a big difference in how your design looks and feels. One of the most common mistakes is picking a fabric that doesn’t match your design or purpose. Cotton: Best for casual T-shirts, breathable, and great for everyday wear. Polyester: Ideal for performance wear, quick-drying, and moisture-wicking. Blends: Cotton-poly blends provide the best of both worlds—comfort and durability. Avoid This Mistake: Think about the purpose of your T-shirt. If it’s for athletic use, opt for polyester or a moisture-wicking blend. For casual, everyday shirts, cotton works best. Always match the fabric to your design’s needs. 2. Ignoring Color Contrast One of the biggest mistakes in custom T-shirt design is ignoring how colors work together. If your design blends into the background color of the shirt, it won’t stand out the way you want it to. On the flip side, too many bright colors can clash and make the design hard to read. Avoid This Mistake: Use contrasting colors that make your design pop. For example, if your T-shirt is dark, use lighter colors in your design, and if the shirt is light, go for darker, bolder design elements. Pro Tip: Always test your color combinations on-screen and in print to see how they will appear on fabric. 3. Using Low-Resolution Images Nothing ruins a custom T-shirt design faster than using low-quality or pixelated images. When your design gets printed on a T-shirt, any image with a low resolution will appear blurry and unprofessional. Avoid This Mistake: Always use high-resolution images when creating your design. Aim for at least 300 DPI (dots per inch) to ensure the design looks sharp and crisp when printed. If you’re using artwork or logos, make sure they’re in vector format (.AI or .EPS) for the best results. 4. Overcomplicating the Design It’s tempting to pack as much as you can into your T-shirt design, but less is often more. Overcomplicating your design with too many elements, fonts, or colors can make the final product look cluttered and hard to read. Avoid This Mistake: Focus on simplicity and clarity. Choose one or two key design elements and stick to a consistent color palette. Remember, a clean and simple design can often make a bigger impact than an overly complex one. Pro Tip: Try digitizing your design (internal link to digitizing services) before printing. This helps streamline the process and ensures the final design translates well onto fabric. 5. Choosing the Wrong Print Placement Where you place your design on the T-shirt can make or break the look. A common mistake is placing the design too high, too low, or off-center. This can lead to awkward-looking shirts that don’t have the professional feel you’re aiming for. Avoid This Mistake: Follow standard design placement guidelines. For example, for chest designs, place the design about 3–4 inches below the neckline. For larger designs, center them evenly on the shirt. If you’re designing for a specific event or purpose, think about how the placement will look when the shirt is worn. 6. Overlooking the Shirt Size Designing without considering different shirt sizes is another common mistake. If your design is perfectly sized for a medium but looks too small on an extra-large or too big on a small shirt, it can affect the overall look. Avoid This Mistake: Make sure your design scales well across all shirt sizes. Test how the design looks on various sizes to ensure consistency and a good fit for everyone wearing the T-shirt. 7. Forgetting About the Audience Another mistake is not designing with your audience in mind. Are you creating shirts for a business, an event, or personal use? If your design doesn’t resonate with your target audience, your shirts may not have the impact you’re hoping for. Avoid This Mistake: Think about who will be wearing the shirt. Is it for a casual event? A corporate uniform? Or a fun, personal project? Tailor the design style, colors, and message to appeal directly to your audience. 8. Not Checking for Typos It sounds simple, but many T-shirt designs have been ruined by a single typo. Whether it’s a brand name, slogan, or event date, having a mistake on your custom T-shirt can be embarrassing and costly to fix. Avoid This Mistake: Proofread your design carefully. Double-check all spelling, dates, and important details before finalizing the design for printing. 9. Ignoring Printing Method Limitations Not all printing methods are created equal, and some may not be suitable for certain types of designs. For instance, designs with gradients, intricate details, or a lot of colors may not work well with screen printing but might be better suited for digital printing. Avoid This Mistake: Understand the limitations of your chosen printing method. If you’re unsure, consult with your printer or embroidery digitizing service provider to ensure your design will print well with the method you’ve selected. 10. Not Getting a Test Print Finally, one of the most common and costly mistakes is skipping the test print. Even if everything looks perfect on your screen, the final product may not turn out the way you expect once printed on fabric. Avoid This Mistake: Always get a test print before committing to a full run. This lets you catch any last-minute errors and see how the design looks and feels on the shirt itself. Conclusion:

How to Avoid Common Mistakes When Designing A Custom T-Shirt! Read More »

8 Different Types of Fabrics You Should Know | Punchdigitzing

8 Different Types Of Fabrics

Choosing the right fabric is essential for any project, whether you’re sewing a garment, designing home décor, or creating custom embroidery. Each fabric has unique properties that make it suitable for specific uses, from breathable cotton to luxurious silk. But with so many options, how do you know which fabric to choose? At Punch Digitizing, we understand the importance of selecting the best fabric for your project. In this guide, we’ll explore the different types of fabrics, their characteristics, and when to use them. By the end, you’ll have a better idea of which fabric will work best for your next creation. 1. Cotton: The Everyday Essential Cotton is one of the most popular and versatile fabrics in the world. It’s a natural fiber that’s soft, breathable, and comfortable, making it ideal for everything from casual wear to bed linens. Cotton is also durable and easy to care for, which is why it’s a go-to fabric for so many projects. Best for: Everyday clothing, T-shirts, casual dresses, quilting, and home décor. Properties: Breathable, soft, durable, and machine-washable. Pro Tip: Cotton fabric is perfect for beginners because it’s easy to sew and works well with a variety of stitching techniques. 2. Polyester: The Performance Fabric Polyester is a synthetic fabric known for its strength and durability. It’s resistant to shrinking and stretching, making it a popular choice for activewear and outdoor gear. Polyester fabrics often have moisture-wicking properties, keeping you dry during physical activity. Best for: Activewear, sports jerseys, outdoor apparel, and bags. Properties: Strong, wrinkle-resistant, moisture-wicking, and quick-drying. Pro Tip: Polyester blends (like cotton-poly) combine the softness of cotton with the durability of polyester, making them ideal for everyday wear. 3. Silk: The Luxurious Choice Silk is a natural protein fiber that’s prized for its luxurious feel and beautiful sheen. It’s soft, lightweight, and has a natural luster that makes it perfect for special occasions and high-end garments. While it’s more delicate than other fabrics, silk’s elegance is unmatched. Best for: Formal wear, evening gowns, lingerie, and scarves. Properties: Smooth, lightweight, shiny, and luxurious. Pro Tip: Silk can be tricky to sew because of its delicate nature, so be sure to use sharp needles and handle it with care. 4. Wool: The Cozy Fabric Wool is a natural fiber obtained from sheep, known for its warmth and durability. It’s a great insulator, making it perfect for winter clothing and accessories. Wool fabrics are also naturally resistant to wrinkles and moisture, making them a reliable option for outerwear. Best for: Sweaters, coats, scarves, and blankets. Properties: Warm, moisture-resistant, and insulating. Pro Tip: Wool can be itchy on bare skin, so consider using wool blends or adding a lining to your garments for added comfort. 5. Linen: The Cool and Crisp Option Linen is a natural fabric made from flax fibers. It’s known for its cool, crisp feel, which makes it perfect for warm weather. Linen is highly breathable and moisture-wicking, so it’s ideal for summer clothing and light, airy home décor. However, it does tend to wrinkle easily. Best for: Summer clothing, lightweight suits, table linens, and curtains. Properties: Breathable, moisture-wicking, and cool to the touch. Pro Tip: Pre-wash linen before using it to prevent shrinkage later, as linen fabrics can shrink significantly after the first wash. 6. Rayon: The Versatile Synthetic Rayon is a semi-synthetic fabric made from cellulose fibers. It’s known for its versatility, as it can mimic the feel of silk, cotton, or wool depending on how it’s made. Rayon is soft, breathable, and drapes beautifully, making it a popular choice for a wide range of garments. Best for: Dresses, blouses, skirts, and drapery. Properties: Soft, breathable, lightweight, and drapey. Pro Tip: Rayon is prone to shrinking and wrinkling, so it’s best to hand wash or dry clean garments made from this fabric. 7. Denim: The Durable Classic Denim is a sturdy cotton fabric that’s known for its durability and rugged appearance. Most commonly used for jeans, denim has a distinctive twill weave that makes it long-lasting and tough. It’s a favorite for casual wear and workwear alike, providing both style and function. Best for: Jeans, jackets, overalls, and bags. Properties: Durable, rugged, and resistant to wear and tear. Pro Tip: Use thicker needles when sewing denim to handle the heavy fabric layers without breaking. 8. Velvet: The Plush and Elegant Fabric Velvet is a luxurious fabric with a soft, plush texture. It’s often associated with formal wear and opulence, making it a great choice for elegant evening gowns or home décor. Velvet adds richness and depth to any project, and it’s available in a variety of styles, including crushed velvet and stretch velvet. Best for: Evening wear, upholstery, and decorative pillows. Properties: Soft, plush, and luxurious. Pro Tip: Velvet can be tricky to sew due to its pile, so take your time and use a walking foot on your sewing machine to prevent the fabric from shifting. 9. Chiffon: The Delicate and Flowing Fabric Chiffon is a lightweight, sheer fabric with a soft, flowing drape. It’s often used in bridal wear, evening dresses, and elegant blouses. Chiffon’s delicate texture requires careful handling, but it adds a graceful, airy quality to any project. Best for: Bridal gowns, formal dresses, scarves, and blouses. Properties: Lightweight, sheer, and flowy. Pro Tip: Use fine needles and a gentle touch when sewing chiffon to avoid snagging or tearing the delicate fabric. 10. Fleece: The Warm and Cozy Fabric Fleece is a synthetic fabric that’s popular for its warmth and softness. It’s often used for casual outerwear, blankets, and cozy loungewear. Fleece is lightweight yet insulating, making it a great choice for cold-weather projects. Best for: Jackets, blankets, and activewear. Properties: Warm, soft, lightweight, and moisture-wicking. Pro Tip: Fleece doesn’t fray, so you can leave the edges unfinished for certain projects, like blankets, to save time. Conclusion: Choose the Right Fabric for Your Next Project Each fabric has its own unique properties that make it suitable for different types of projects. Whether

8 Different Types Of Fabrics Read More »

iron on transfer paper

How to Use Iron-On Transfer Paper: A Step-by-Step Guide

If you’re looking for a fun and easy way to customize clothing, bags, or home décor, iron-on transfer paper is the perfect tool to achieve professional-looking results right from home. Whether you’re crafting for personal use or making customized products for your business, knowing how to use iron-on transfer paper can save you time and money while unleashing your creativity. In this blog, Explore the step-by-step process of using iron-on transfer paper and some helpful tips to ensure flawless results every time with Punch Digitizing. What is Iron-On Transfer Paper? Iron-on transfer paper is a special type of paper designed to transfer printed designs onto fabrics and other surfaces using the heat from an iron. The process is simple: you print your design onto the transfer paper using an inkjet or laser printer, then use an iron to transfer the image onto the desired fabric or surface. It’s a fantastic way to customize t-shirts, tote bags, aprons, and more. The real beauty of iron-on transfer paper is its versatility. You can create everything from simple text designs to intricate artwork, and the process works well on both light and dark-colored fabrics, depending on the type of transfer paper used. Step-by-Step Guide on How to Use Iron-On Transfer Paper Now, let’s walk through how to use iron-on transfer paper in a few simple steps. Step 1: Gather Your Materials Before you start, you’ll need a few key materials: Iron-on Transfer Paper (choose the type suited for light or dark fabrics) A printer (either inkjet or laser, depending on the paper’s instructions) A design (this can be a custom graphic, photo, or text) A pair of scissors A t-shirt or another fabric item A hard, flat surface (like an ironing board or table) A household iron Parchment paper (optional, often used with dark transfer paper) Ensure that your fabric is clean and smooth. Avoid using wrinkled or dirty items, as this could affect the final transfer. Step 2: Choose and Print Your Design Once you’ve gathered your materials, it’s time to choose your design. Whether you’re creating a personal logo, a photo, or an inspiring quote, make sure the design looks the way you want it to appear on the fabric. Mirror the Image for Light Fabrics: If you’re working with light-colored fabrics and using transfer paper meant for light colors, you will need to mirror or flip the design before printing. This ensures that the image prints in reverse, and when applied to the fabric, it appears correctly. Keep the Image as Is for Dark Fabrics: For dark-colored fabrics, you do not need to mirror the image. Once you’re ready, load the transfer paper into your printer. Be sure to print on the correct side of the paper. Follow the instructions provided by the manufacturer regarding print settings (inkjet vs. laser). Step 3: Cut Out the Design After printing your design, use scissors to carefully cut around the image. Try to leave as little excess paper as possible, as any blank areas of transfer paper will also transfer onto your fabric and may leave unwanted lines or markings. For intricate designs, you can use a craft knife or cutting machine to achieve more precise cuts. Step 4: Prepare Your Fabric Lay your t-shirt or fabric item flat on a hard, heat-resistant surface. It’s important to iron out any wrinkles beforehand, as they can cause the transfer to be uneven or create creases in the design. Make sure the fabric is fully smooth and ready to receive the transfer. Step 5: Position the Transfer Paper Place your transfer paper onto the fabric, with the design side facing down (for light fabrics). For dark fabrics, place the design face-up, and use parchment paper (if provided) over the top of the transfer. Ensure that the paper is positioned exactly where you want the design to appear on the fabric. Once it’s in place, be careful not to move it around, as this could blur the design during the transfer process. Step 6: Iron the Design Now, it’s time to iron the transfer. Set your iron to the hottest setting that your fabric can tolerate (typically “Cotton” or the highest setting). Make sure the steam setting is turned off, as you only want dry heat for the transfer. For Light Fabrics: Iron directly on the back of the transfer paper in slow, steady motions. Press down firmly to ensure the heat is evenly applied. For Dark Fabrics: Place the parchment paper over the design before ironing. This helps protect the transfer and ensures even heat distribution. Iron for the recommended time (usually 2-3 minutes), but be sure to follow the specific instructions that come with your transfer paper, as times may vary depending on the brand. Step 7: Let it Cool and Peel After ironing, allow the transfer to cool for a few minutes. This is important because it gives the transfer time to adhere to the fabric properly. Once cool, slowly peel away the backing paper. Start from one corner and pull gently to reveal your design. If you notice any parts of the design lifting, re-iron the area for a few more seconds, then let it cool again before peeling. Tips for Success When Using Iron-On Transfer Paper Test First: Always test your transfer on a scrap piece of fabric before applying it to your final product. This allows you to make sure the transfer works properly and that you like the color and design. Use a Hard Surface: Avoid ironing on soft surfaces like a bed or couch. A sturdy table or counter will ensure even heat distribution. Choose the Right Paper: Be sure to choose the right type of transfer paper for your project. There are different types for light and dark fabrics, and using the wrong one can affect the final result. Proper Care: After transferring your design, allow the type of fabric to cool completely before wearing or washing it. When washing, turn the garment inside out and

How to Use Iron-On Transfer Paper: A Step-by-Step Guide Read More »