Aziz

What is Applique Embroidery | Applique Embroidery Trends

Things to Know About Applique Embroidery

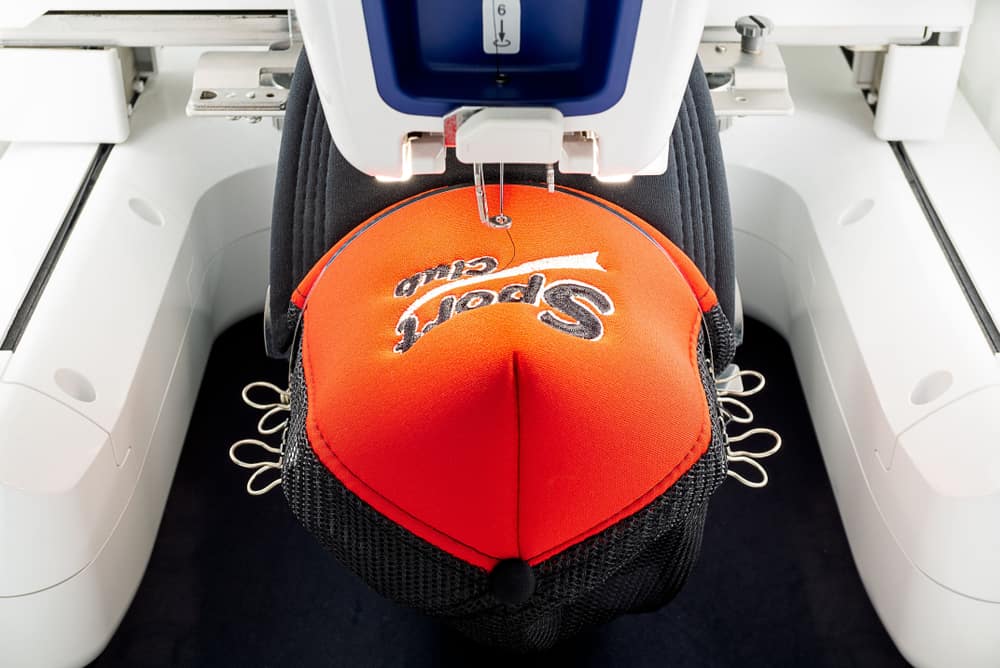
Appliqué embroidery is a timeless technique that adds texture, dimension, and color to any project. Whether you’re looking to personalize clothing, create unique home décor, or add flair to accessories, appliqué offers endless creative possibilities. But what exactly is appliqué embroidery, and how can you keep up with the latest trends? At Punch Digitizing, we bring your embroidery visions to life, including custom appliqué designs that stand out. Let’s dive into what appliqué embroidery is, how it works, and the latest trends you can incorporate into your projects. What is Appliqué Embroidery? Appliqué embroidery involves sewing a piece of fabric onto a larger fabric surface to create a design. Instead of stitching a design entirely with thread, appliqué uses fabric pieces to build shapes, colors, and textures, which are then stitched around the edges to secure them. This technique allows you to add bold patterns, multiple colors, and texture to your embroidery without the need for heavy stitching. In essence, appliqué is like fabric collage: you cut shapes from one fabric and apply them to another, stitching them in place with decorative stitches like satin stitch, blanket stitch, or even zigzag stitch. How Does Appliqué Embroidery Work? Here’s a simple breakdown of the appliqué embroidery process: Step 1: Choose Your Design and Fabrics Start by selecting the fabric for the base (the background fabric) and the fabric pieces you want to appliqué. Your appliqué fabric should complement the base and the overall design of your project. Base fabric: This is the fabric where your appliqué will be placed. Choose something sturdy enough to handle the stitching and the additional fabric layers. Appliqué fabric: These are the pieces you will cut out and attach to your base fabric. You can use any type of fabric, from cotton to felt, depending on the effect you want to create. Step 2: Prepare the Appliqué Pieces Once you’ve selected your fabrics, trace or cut out the shapes you want to appliqué. These shapes can range from simple circles or hearts to more intricate designs, such as letters, flowers, or animals. Use fusible web (a double-sided adhesive) to hold the fabric pieces in place before stitching. This temporary hold makes it easier to position the appliqué exactly where you want it and keeps the fabric from shifting during stitching. Step 3: Secure with Stitches After you’ve placed the appliqué pieces on your base fabric, it’s time to stitch around the edges to secure them. The most common embroidery stitch for appliqué is the satin stitch, which is a dense, closely spaced stitch that creates a neat border around the edges of the fabric pieces. Other options include: Blanket stitch: A decorative, looped stitch that adds texture around the edges. Zigzag stitch: A simple, clean stitch that provides a secure hold. Appliqué Embroidery vs. Traditional Embroidery The biggest difference between appliqué and traditional embroidery is that appliqué uses fabric pieces to create designs, whereas traditional embroidery relies solely on thread. Appliqué is often faster than traditional embroidery because you don’t need to fill large areas with dense stitches—fabric pieces do most of the work. It’s also a great way to add texture and layers to your projects without adding too much bulk. Popular Appliqué Embroidery Techniques There are several types of appliqué embroidery techniques you can explore: Raw edge appliqué: Leaves the edges of the appliqué fabric raw, allowing them to fray slightly for a more rustic or textured look. Turned edge appliqué: Involves folding the edges of the appliqué fabric under before stitching for a clean, finished look. Reverse appliqué: Instead of layering fabric on top, this technique involves cutting away sections of the top fabric to reveal another fabric underneath, creating a layered design effect. Appliqué Embroidery Trends to Watch Appliqué embroidery is experiencing a resurgence in the fashion and décor world, and these are some of the trends shaping this creative technique: 1. Layered Fabric Effects One of the biggest trends in appliqué is creating multi-layered designs that add depth and complexity to the fabric. This involves layering different fabrics, textures, and colors to achieve a 3D effect. Using contrasting textures—like mixing cotton with velvet or denim with lace—creates a striking visual impact. 2. Mixed Media Appliqué Modern appliqué designs are embracing mixed media, combining traditional fabric with elements like sequins, beads, and embroidery to create eye-catching designs. This trend allows for more creativity, blending appliqué with hand or machine embroidery to add dimension and shine. 3. Bold and Geometric Patterns Bold shapes and geometric patterns are trending in appliqué embroidery. Large, oversized shapes like triangles, squares, and circles, or intricate geometric patterns, bring a modern edge to both fashion and home décor. Using bold colors in these designs makes them pop against a neutral background. 4. Custom Monograms and Lettering Personalized appliqué, especially in the form of monograms or lettering, is a popular trend for clothing, accessories, and home décor items. Whether you’re stitching initials onto a bag or creating a decorative lettered pillow, custom appliqué designs add a personalized touch. 5. Nature-Inspired Designs Floral and nature-inspired appliqué designs never go out of style, but recent trends focus on larger-than-life florals and botanical elements. Large appliqué leaves, flowers, and animal silhouettes are popular in both fashion and interior design. How to Incorporate Appliqué into Your Embroidery Projects If you’re new to appliqué or looking for inspiration, start with simple designs like hearts, stars, or basic shapes, and work your way up to more complex patterns. Consider using digitized embroidery designs to ensure precision, especially for more intricate appliqué pieces. Whether you’re working on clothing, accessories, or home décor, appliqué is a versatile technique that allows you to experiment with different fabrics, textures, and colors. For professional results, you can always turn to Punch Digitizing for custom appliqué digitizing services. Conclusion: Get Creative with Appliqué Embroidery Appliqué embroidery offers endless creative possibilities, from adding personal flair to clothing to creating bold, textured home décor pieces. As this technique continues to evolve with trends

Things to Know About Applique Embroidery Read More »

How to Choose Best Embroidery Digitizing Company in USA

Choosing the Best Embroidery Digitizing Company in USA

Choosing the embroidery digitizing company like Punch Digitizing is a very delicate job and it is very important to choose a company that you can fully trust. Nowadays, most companies offer their services online, so there is no need to tire yourself with the questions of where and how far the company is located to use their offers. But certain procedures do need to be taken care of to offer a good company fit for your digitizing specifications for embroidery. When looking for the best company to focus on, there are some of the key elements you have to take care of. Get the Best Embroidery Digitizing Partner for Your Business in USA Ensure high-quality embroidery designs with the right digitizing company. Get a free consultation to find your ideal digitizing partner. Get A Free Consultation Quality assurance: The quality of the digitization service is one of the most important elements. Since digitizing relies heavily on the machines and technology used, it is also important to check how and what enhanced technologies, consistent computing, and software are used for digital embroidery artwork. Knowing the overall market importance and public performance of the company you are going to be affiliated with is strongly recommended. Mostly the reasons for the achievement and failure of a project provided to a service provider are the program software and facilities used. The services provided by the Embroidery Digitizing Company Knowing the service chart of your likely digital business option is the second most cherished element. The company should also offer a range of services at a time, such as free backup of your artwork, promotional discount deals, a combination of time-based processes, and distribution of techniques, cheap digitizing pricing is not enough. If you are unsatisfied with the conversion value, the company should reconvert the design with a 100 percent money-back guarantee free of charge. Promotional and Curtailed Embroidery offers. To make their services more accessible, you can feel free to ask the digitizing company about the deals they have for their customers. Their offers and discounts give you an idea of competitiveness, relation to the market, and actions towards new customers. Embroidery Digitizing Consumer Reputation. A strong reputation and word of mouth mean a lot when deciding to work with a digitizing company. A business should have a good customer service unit network where questions and the customer’s embroidery requirements should be taken care of directly as a primary choice. You should ensure they provide excellent and authentic customer support programs before selecting the company for your job. Timeliness of the Embroidery Digitizing Company. For a time-driven company-like Embroidery Digitizing, time is a crucial factor in producing the results of the designs with absolute perfection on time. If the digitizer is unable to keep up with the deadlines and does not turn in the assigned project at the agreed time, then what is the use of digitizing discounted costs? There is no question that the delivery period is a fundamental element in determining the performance of your business. So the principles of turnaround time and punctuality are essential for the success of a potential supplier services company.

Choosing the Best Embroidery Digitizing Company in USA Read More »

digitize your logo

How to Digitize Your Logo for Embroidery

Embroidery machines do not read the same file types as your computer can, so before they can do their job, you have to digitize your logo so that the machines can understand. From the viewpoint of a digitizer, this typically involves taking a JPG or PNG image of a customer’s corporate logo or artwork and converting it into an embroidery file. The type of embroidery file is determined by the type of embroidery machine you’re going to use. Punch digitizing will guide you each and every step. Want To Professionally Digitize Your Logo for Your Business? Let Punch Digitizing transform your logo into a flawless embroidery design with expert precision and care. Get Free Quote Now How to Digitize Your Logo You will move ahead with converting the artwork or emblem into the correct file form once you know what kind of embroidery machine you’re working with. You’ll need to have digitization software built on your computer to do this. For commercial digitizing, our Senior Digitizer recommends Wilcom Advanced Digitizing Tools. Brother Embroidery Design Software, Husqvarna Premier+ Embroidery Software, Janome Digitizer Software, and Embird Machine-Independent Embroidery Software are other common digitizing software. Follow the steps below once you’ve selected the embroidery software. 1. Upload your logo You will insert your logo or design file (JPG, PNG, etc.) into the software in this first step and crop out any unwanted blank space around the image that you want to embroider. 2. Set Embroidery Design Size For your embroidered logo or design, enter your desired dimensions. This will be the exact size that your image will appear on your object, so make sure to measure the available space for embroidery carefully! Once you have it just right, before moving on to the next stage, make sure to lock the picture. 3. Pick Your form of stitch A range of different types of stitches is used to achieve different looks, textures, and more. Each type of stitch has a maximum stitch length that must be considered. When choosing your stitch styles, you should also remember the fabric and the “push and pull” of the garment. Here are the three most common stitch styles for machine embroidery. Straight Stitch The straight stitch is a simple embroidery stitch in which straight lines of stitches are repeated to create a pattern. By repeating a straight stitch several times, you can create thick lines. It is important to remember that straight stitches can be used for curved shapes, not just straight lines! Satin Stitch If you want text embroidered, then the satin stitch is probably the type of stitch for you. Satin stitching has a longer thread length that gives it a shiny look that works well for lettering. 12.1mm is the maximum stitch length for satin stitches. Fill Stitch Often known as the tatami stitch or the ceding stitch, as its name implies, the fill stitch is usually used to fill patterns. Filling stitches use alternating lines to give a woven look to the embroidery. For filling stitches, the maximum stitch duration is 4mm. 4. Set Stitch Direction Setting the direction of the stitch is simply making a road map to follow your embroidery machines. You’ll tell the machines to provide step by step instructions for each stitch in this step. Different stitch patterns may be used to achieve the appearance of various contours, textures, and colors. Too many trims hops and an unsightly machine pattern will result from skipping this stage. You’ll also save time and thread by having a successful stitch path! 5. Set Your Embroidery Thread Colors From the color bar, choose your embroidery thread colors. Be sure to match the colors of the embroidery thread to your Pantone corporate logo colors. Check out our PMS Color Matching Chart if you’re unsure what your Pantone colors are and then display them in thread form in our Embroidery Thread Color Guide. 6. Transfer the File to Your Embroidery Machine Transfer to your embroidery machine your converted embroidery file (dst, exp, jef, etc). Using a USB cable, flash card or directly from the device running the embroidery software, this can be achieved. 7. Prepare the Embroidery Machine for Embroidering To get your embroidery machines ready to stitch out your digitized company logo or design, you need to take a few steps. By choosing the correct needles, threads, orientation, and embroidery series, you first need to notify the computer about the design elements. Make sure your computer has the colors of your appropriate thread. Then, in your embroidery loops or embroidery frames, put your items or fabric and slide them into the embroidery machine arms. 8. Embroidering a sample, test your digitized logo See your embroidery machine go to work on the logo or design you have recently digitized. This is expected to take just a few minutes! Check the embroidered design once it is completed to see if you need to make any digital changes before embroidering your items. Make the modifications and evaluate again if necessary until you’re pleased with the result. Then you are ready with your perfectly digitized logo to embroider items!

How to Digitize Your Logo for Embroidery Read More »

Is There a Free Embroidery File Format Converter?

Embroidery file formats are the way to save an embroidery design to be stitched out on a particular embroidery machine brand. Some brands of embroidery machines (such as Brother or Bernina) need different file formats for embroidery design (such as PES. or ART.). For an embroidery file format to be read or understood by an embroidery machine, the native language known by a brand of embroidery machine must be spoken. We are all familiar with computers since there are PCs & Mac computers. Some programs & files are created to run only on a Laptop, as you well know, while some files are created to run only on a Mac. In other words, a PC or Mac-based operating system is proprietary to those programs & files. They’re running on one or the other only. For embroidery file formats, the same thing goes. A particular embroidery file format (e.g., PES.) is proprietary to a separate brand of embroidery machines (example: Brother) Simplify Your Embroidery Projects with Punch Digitizing Create professional-quality embroidery designs with ease using punch digitizing techniques. Get A Quote Now The development of embroidery file formats There was just a stitch there a few years before. A running stitch was created from that stitch, a satin stitch, and then a filling stitch. All began with a single stitch. That was over 35 years ago, and since I started my career as a manual pantograph puncher, I must admit that much has changed. In the early days of embroidery automation, by reading Jacquard paper tapes, Schiffli looms ran. These tapes were the first embroidery file format, and it operated inside a mathematical base, much like today. By its reader, the “automat” fed the tape at the end of the loom. The reader consisted of pins that would release the paper tape through the holes and send the computer commands, just like old paper tape music boxes. I’d shift X or Y (direction), launch machine functions such as needles in or needle out, slow or quick speed, boring plate in or out, and a command to adjust stop/color. Our modern computers, in many respects, function in a very similar way. Embroidery File Types by Machine dst: embroidery file format for Tajima commercial embroidery machines exp: embroidery file format for Melco commercial embroidery machines jef: embroidery file format for Janome commercial embroidery machines kwk: embroidery file format for Brother commercial embroidery machines dsb: embroidery file format for Barudan commercial embroidery machines tap: embroidery file format for Happy commercial embroidery machines Free embroidery file format converter options Your best choice for converting embroidery files from one format to another is possibly Wilcom Truesizer. You first have to register on their website to gain entry. Then, you can choose to download the software’s desktop edition or use the web-based option. I have used the web-based version of Wilcom Truesizer since the desktop version only runs on a PC, and I operate on a MAC. Another choice is to use EmbroideryDesigns.com’s web-based tool. I went to their site, built an account and transformed one of my embroidery designs from a PES to a DST file. It seemed the conversion went great. But (here’s the catch), the site only lets you convert five files for free every month. Is this possible to convert a bunch of embroidery files at once? Yes. A whole set of files can be transferred from one type of embroidery file format to another. It’s called “batch conversion.” If you have a group of files that all need to be transferred to a particular format, batch conversion is helpful. I realized quickly that I needed to be able to batch convert when I began digitizing. It just took too long to save each design individually. Plus, I would not save my file in all the formats I wanted to give my clients with my digitizing program. So, I set out to look for inexpensive software for batch conversion. Many of the major digitizing programs these days have a batch conversion feature.

Is There a Free Embroidery File Format Converter? Read More »

dst file embroidery

What is a DST File in Embroidery and How to Use It?

When you work with machine embroidery, you often come across DST files. These files are essential because they turn your designs into stitch-ready patterns that your embroidery machine can read. But what exactly is a DST file, and how do you use it in your projects? At Punch Digitizing, we help you create high-quality embroidery designs by converting them into DST files. Let’s explore what a DST file is, why it’s important, and how you can use it effectively. 1. What is a DST File in Embroidery? A DST file (Data Stitch Tajima) is a file format that contains stitch commands for embroidery machines. Developed by Tajima, one of the leading brands in embroidery machines, the DST format is widely used across the industry. This format tells your machine where to place each stitch, what stitch type to use, and the order in which to stitch the design. DST files contain all the technical details your machine needs to stitch a design accurately. From stitch placement to direction, it includes everything necessary to turn your digital design into a reality on fabric. 2. Why Do DST Files Matter? DST files matter because they provide universal compatibility with most commercial embroidery machines. Whether you’re working on a home machine or an industrial setup, a DST file ensures your design stitches smoothly without the need for further adjustments. Here’s why you should use DST files: Compatibility: Almost all commercial embroidery machines support DST files, so you won’t have to worry about converting the design again. Efficiency: The DST file holds all the stitching instructions, making the embroidery process faster and more streamlined. Precision: With a DST file, your machine follows exact stitching directions, leading to accurate, professional-quality results. 3. How to Use DST Files for Embroidery Using a DST file is simple, and it starts with digitizing your design into this format. Let’s walk through the steps to use DST files in your embroidery projects. Step 1: Digitize Your Design Before you can load a DST file into your machine, you need to digitize your design using embroidery software. If you don’t know how to digitize, Punch Digitizing offers professional digitizing services to create embroidery-ready DST files. To digitize your design: Open your design in embroidery software such as Wilcom, Hatch, or Embrilliance. Assign stitch types, directions, and other settings to your design. Save the file as a DST format. This file now contains all the stitching instructions your machine will need. Step 2: Load the DST File onto Your Embroidery Machine Once you have the DST file ready, you’ll need to load it into your embroidery machine. Depending on your machine, you can do this by: USB drive: Copy the DST file onto a USB drive and insert it into your machine. Direct connection: Connect your computer to the machine via a USB cable and transfer the file. Wi-Fi: For modern embroidery machines, you can wirelessly transfer the DST file using Wi-Fi. Step 3: Set Up Your Fabric and Thread Before starting the embroidery process, make sure your fabric is properly hooped and stabilized. Select the right thread colors for your project. Some DST files include color information, but if not, you can manually select the colors on your embroidery machine’s interface. Step 4: Start Stitching Once your fabric and thread are set up, you can begin stitching. The embroidery machine will read the DST file and follow the stitch instructions to recreate the design on your fabric. 4. Benefits of Using DST Files in Embroidery Using DST files offers several benefits that make the embroidery process smoother and more efficient: Universal compatibility: DST files work with nearly all commercial embroidery machines, making it easier to share or use designs across different platforms. Accurate stitching: With the precise stitch instructions embedded in the file, you can avoid errors or misaligned stitches. Efficient workflow: DST files simplify the setup process, allowing you to move from design to embroidery without lengthy adjustments. 5. How to Convert Other Files to DST Format If you have a design in a different format (like a .JPEG, .SVG, or .PES), you’ll need to convert it to DST format before using it with most commercial embroidery machines. You can easily do this using embroidery digitizing software. To convert your design: Import your existing file into the embroidery software. Use the software to digitize the design, assign stitches, and make any necessary adjustments. Export the design as a DST file. If you’re unsure how to do this, Punch Digitizing offers digitizing services that convert any design format into a DST file for embroidery. 6. Troubleshooting Common DST File Issues While DST files are reliable, you may encounter some issues. Here’s how to solve common problems: Corrupted file: If your DST file gets corrupted during transfer, try re-saving or re-exporting it from the original design software. Missing thread colors: If the DST file doesn’t include color data, manually set the thread colors using your machine’s interface. Stitch errors: If your machine isn’t stitching the design correctly, review the stitch directions and paths in the original digitized file to ensure they were set up correctly. Conclusion: Simplify Your Embroidery with DST Files DST files are the standard for machine embroidery because they provide the precise stitch instructions needed to create detailed, professional designs. By digitizing your designs into DST format, you ensure compatibility with most embroidery machines and streamline your workflow. Contact Punch Digitizing, we can help you convert your designs into high-quality DST files, ready for any embroidery project. Our digitizing services  make the process easy, whether you need a simple logo or a complex, multi-color design. Get started today and take your embroidery to the next level!

What is a DST File in Embroidery and How to Use It? Read More »

How to Do 3d Puff Embroidery on Hats | PunchDigitizing

How to Do 3d Puff Embroidery on Hats and Best Practices for 3d Embroidery

Here, we will talk about how to do 3d puff embroidery on hats? 3D puff embroidery is simply an art. It is the talent of a digitizer who makes the utmost effort to develop eye-catching designs. The embroidery of 3D puff is distinct from simple designs. There is a deepness in the artwork on 3d models. We will explore 3D embroidery for hats in this post. To get the best performance, we will also explore some tips to perform better. When you want to have custom artwork, the 3D puff style is relatively pricey. Depending on the quantity, material, and embroidery design you want on your hat, the charges will vary. The work is done in the digital age by computer software and embroidery machines. The embroidery of 3D puff is itself an art that involves practice, practise and practise. The more interest you get, the easier it will be to strengthen your weak areas. There has been an ever-increasing demand for 3D designs over the past few years, particularly for hats. Staying true to best practises in 3D puff embroidery means achieving better outcomes and low cost and time in manufacturing. If you master the ability to digitize 3D puff embroidery, you can surpass your competitors in the following fields. Here, we will talk about some of the best practises for 3D embroidery that can benefit you in the long run. 1. Set the speed of your machine It is essential to decide your embroidery machine’s ideal speed because it determines the embroidered designs’ efficiency. According to your instructions, you will also need to slow the pace down. For each embroidery machine, the maximum speed is different. A good approach is to run a few different speed tests to decide the optimum speed that will yield the best results. 2. Your fabrics matter a Lots Consider using 3D puff fabrics that are prone and slippery. There are two explanations for that. First, the stitch density of 3d puff embroidery is higher than standard designs. Second, the surface is more susceptible to vibrations in the hoop when dealing with rubber. Therefore, dense, stable fabrics are favoured, like those in caps. Noble fabrics like towels often don’t go well with 3D puff embroidery. The 3d effect fades their own loft and thus fails to appeal to a convincing design. 3. Creating Stops And Laying The Foam If the flat design is finished, you can build a stop. As this is something that you will need a lot in your career as you deal with 3D puff embroidery, you need to learn how to programme stops in your machine. You need to make sure the system offers sufficient stops on colour changes. 4. Making The Outline Before embroidering with satin stitches, you need to create a template outline after laying the foam and making a stop. The zone that can be broken down will stabilize this outline. Due to the foam, the set-up is increasingly unstable. The foam is sticking to the material due to this. Stitching a sketch by presenting foam with the ‘split.’ counteracts this inherent uncertainty. 5. Remove the Foam Excess When the template has been completed, replace the excess foam. If there are small puff bits that are too hard to be collected with bare hands, use a heat source. You should make use of a heat gun to melt the foam. Certain puff parts likely remain trapped. Take them out with tweezers. 6. Do Some Test Runs Try sewing out some test runs while you’re working with a new concept to prevent a mishap. Compare different models and select the best working fabric and equipment. For inexperienced embroiderers, this drill often serves as a training area. This allows them to determine what works and what does not work so well. This enables them to benefit from optimum conditions for real sew-out and related future jobs.

How to Do 3d Puff Embroidery on Hats and Best Practices for 3d Embroidery Read More »

embroidery thread keeps breaking

Types of Thread Breaks and How to Reduce Thread Breaks in Embroidery Digitizing?

The most common problem in the digitizing industry is thread breaks. You may have experienced the problem of splitting those bulky threads if you’re a beginner or even a seasoned quilter. “It can make you want to throw your hands in the air and scream, “Why is my thread still breaking on the sewing machine? What’s the problem and do I solve it? Well, this is a common but frustrating problem. It prevents everyone, including the expert sewer, from completing a piece you’re passionate about. In this article, I will tell you some types of thread breaks and how to reduce thread breaks in embroidery digitizing? There are several ways to avoid these issues from happening occasionally. We have experts who are well conscious of the nitty-gritty of the digitizing process of embroidery. We will address all of the big thread breaking issues with you. In the embroidery digitizing process, why they occur and what steps we can take to avoid thread breaking. When your thread keeps breaking, it’s frustrating. And reprocessing and patching the upper thread on your embroidery machine is getting more annoying and dull. It will help you easily define the problem and fix the problem by knowing why the thread break problem occurs. It will result in the job being done smoothly and productively. Let’s talk about the causes of the thread break, mistakes, and precautions. Thread Break Errors 1. Check The Thread The problem may be that it is not correctly installed in the sewing machine if your upper thread breaks. Familiarize yourself with and communicate with every part of the upper thread strand. By following the strand, you need to ensure that the top thread is correctly installed at each point. It will help you narrow down the source of the breaks in the thread and ensure that they operate smoothly. 2. Check The Needle The needle is examined. It should be inserted in a specific manner. The flat side of the needle needs to be away from you. With the aid of a screwdriver, you can tighten the needle clamp. You don’t have to worry because you can find instructions on how to install and take care of each component on every sewing machine. 3. Check The Tension Another factor that can lead to thread breaks in the digitization of embroidery is tension. You need both the upper and the lower tension to be tested. The top and bottom threads should have the same tension to achieve equal stitches. The lower strand may be adjusted by hand, if possible, depending on the embroidery machine you have. In addition, to be calibrated at the required strain, older machines would require upper and lower strands. That is because there are no automated modifications to the older unit. 4. Check The Bobbin Bobbin can also be a thread breaking element. Check to ensure that the bobbin thread is correctly positioned. Ensure that the thread is wound uniformly in the case of the bobbin. Slow and consistent, it’s a rabbit and turtle race where you need to be a turtle. Some Key Tips To Fix Problems As mentioned above, if you face a bigger problem, a service might be required for your embroidery machine. Here are some tips to that will help you to reduce thread breaks in embroidery digitizing. 1. Make Sure There Is A Smooth Thread Path Clearing the thread path is important. Clear the line in your direction. Take out the thread and follow the path. Slowly shift your hands around some major points, such as the throat plate or the bobbin. Ensure that there are no threads or needles that obstruct the thread’s path or disrupt the motion. 2. Always Use The Right Needle Testing the needle is as critical as any other aspect. The correct needle’s use determines the consistency of stitches regardless of the material and instrument you are using. For instance, a thinner needle is required for thin or delicate fabrics and a thicker needle for heavier fabrics. 3. Don’t Forget To Check The Bobbin For any bits floating away from earlier quilting efforts, search the bobbin and case. To clear up any bits that might be stuck in the case of the bobbin, you can turn your unit upside down and shake it a little bit. 4. Check The Throat Plate Throat plate inspection. A throat plate is also referred to as a plate with a needle. Ensure that the throat’s surface on the computer is correctly located so that the needle does not contact the body. Unfortunately, people sometimes neglect this issue and appear to have a broken needle plate and have problems with thread breaks.

Types of Thread Breaks and How to Reduce Thread Breaks in Embroidery Digitizing? Read More »

factors that influence the quality of embroidery digitizing

Factors That Influence The Quality Of Embroidery Digitizing

The digitization of embroidery has taken center stage in the marketing strategy of companies. Embroidery digitizing is one of the best strategies for companies to produce promotional products, from logo digitizing to digitized caps, shirts, and other pieces. The digitization of embroidery may seem straightforward, but there are different factors and technicalities behind the operation. You need to uphold the highest quality of digitizing and follow best practices to come up with the best digitization for embroidery products. Below we have come up with some of the significant factors that influence the quality of embroidery digitizing services. 1. Embroidery Digitizing Instructions Digitizing for embroidery design consists of an intricate procedure that needs to be followed precisely to achieve the best result. Now, irrespective of the complexity of the nature of digitizing services, the ultimate output of the digitizing services will be highly influenced by the instructions given to the digitizers. Note that the more accurate the digitizer’s information, the better the results you can expect from the embroidery digitization. Only the digitizers would be misguided by inadequate or ambiguous instructions, thus affecting the overall design efficiency. 2. Fabric You can use for the design of digitized embroidery. The digitizing services are often affected by the type of fabric. Each type of fabric comes with unique features and needs to be accompanied by complex digitizing techniques. For e.g., if you are looking for denim embroidery jobs, but the method followed was for a lighter fabric, you will not be able to achieve any desirable quality results. When the digitizing method for lighter fabric is applied to heavy fabric, this is also true for the reverse case. This is why companies need to choose professional digitizing embroidery companies with skilled digitizers, trained to work with all kinds of fabrics. 3. Digitizing Tools for Embroidery The method used for creating digitized files is another important factor that affects the consistency of the digitized file. To come up with the highest quality digitization of embroidery is important to work with the industry norm and the new digitizing software that provides advanced digitizing tools. Also, in line with the desired output file format, the option of digitizing software should be made. So, if you are looking to outsource digitizing embroidery services for your company’s promotional products or for digitizing the logo, ensure that the company uses the new digitizing software and can provide the desired file format. 4. Stitching out the Digitized Embroidery Designs Finally, the embroidery pattern is often greatly affected by the form and density of stitches. As per the design and type of fabric, the stitch and stitch density needed for the best result varies. The digitizers’ expertise and skills come into play for the stitching quality for most pieces. The digitizer needs to keep the design integrity intact while taking on different considerations such as underlay, stitch length, stitch width, etc. Stitching consistency will also be influenced by the needles and thread used. To make crisp stitches, the needles should be sharp enough, while the use of a broken needle will lead to the fabric puncturing. Are you looking for high-quality digitizing services for your company? At Punch Digitizing Solutions, we provide reliable and highest quality digitizing services to companies of all sizes for all kinds of promotional merchandise.

Factors That Influence The Quality Of Embroidery Digitizing Read More »

A Complete Guide To Embroidery For Beginners | PunchDigitizing

Complete Guide To Embroidery For Beginners

Hand embroidery is so versatile and is a beautiful skill to learn and master. Whether you have sewed for tears or picked up a needle for the first time, you will undoubtedly pick up new skills and techniques! after reading this embroidery for beginners guideline. Embroidery is as simple as drawing on a piece of fabric and then stitching over it, but the skill that makes all the difference is the variety and shape of the various stitches used. It doesn’t have to be hard to learn embroidery, and it certainly shouldn’t feel like a big investment of time and money. It is a cheap and easy hobby to jump into! Step by step guide to embroidery for beginners Step1: To stop it from fraying, prepare your fabric. There are a few ways for this to be done. Seal the edges with masking tape for a fast repair, or you can simply use pink shears to trim around the edge. Use a sewing machine to stitch a quick zigzag around the edges for the most secure finish. Step2: The Design Transfer. Templates are used by most embroidery projects, which you will need to transfer to your fabric. Tracing it is the easiest way. Put the right side of the fabric over the template and secure it with masking tape. Using a pencil, water-soluble pen or chalk in a color that shows up on the cloth, draw all the marks. Then tape the design and fabric onto a window if you are struggling to see the design through the fabric. To trace the design as before, the light will shine through so that you can see. Step3: Place the fabric into a hoop or frame once you’ve traced your pattern. This will have the right stress and it will be neater for your stitches. Step4:  A waste knot is the easiest way to get started. Knot one end of your thread and pull it down, about 2.5cm (1in) from your starting point, through the front of your fabric. To make the first stitch, put it back up. To make sure you stitch over your starting thread, start stitching your pattern. Simply snip off the knot once your starting thread is tight. You can also try a loop knot start for the neatest finish if you’re stitching with 2 strands of thread. Step5: Now work your way around the pattern you have traced to create a series of tiny embroidery stitches. Step6: Weave it around the back of your stitches to protect the thread when you’ve done stitching. What you’ll need to start embroidering? Embroidery hoop – This is a two-part ring. You place the fabric between the hoops – this helps to hold it secure, making it easier to embroider. I choose plastic for embroidering and wood for showing the embroideries – these come in plastic and wood. Small and sharp scissors. You will find these under many titles, but a google search for “embroidery scissors” will get you what you need. Your chosen fabric! All the great options are linen, cotton quilting, canvas and osnaburg! It is not required to be too loosely woven or too tight. Embroidery floss. Floss for embroidery. It’s affordable and comes in lots of colors. I prefer and exclusively use DMC floss. Needles for embroidery. These have wider eyes to fit the size of the floss than usual needles. A marker that is soluble in water or another labelling method. You can draw patterns on your fabric that way! It’s safer to use a water-soluble pen so that you can finally clean the marks with cold water. Any fabric you like! Muslin, cotton quilting, linen and canvas all fit well. I usually have embroidery on a mix of linen. How to use an embroidery machine for beginners It can turn out to be a daunting task to learn how to use an embroidery machine, particularly if you have no past experience at all. While most machines are automatic nowadays and perform most tasks by themselves in the entire embroidery process, you still need to change the settings to accomplish the desired task. In addition, you will need to be absolutely aware of your machine’s capabilities. Despite how complicated it sounds, it is a reasonably simple job to learn how to use an embroidery machine, which has been made even simpler because devices are now built to be as user-friendly as possible.

Complete Guide To Embroidery For Beginners Read More »

convert jpg to embroidery file

Convert logo or Jpg Image to Embroidery File Free

Whenever you need an embroidered design, you need to digitize it. You may obtain any design ready for embroidery using the services of an embroidery digitizer. Digitizers usually charge either a fixed price or per stitch count, digitizing costs vary. The client ends up paying the same amount. We will discuss how to convert logo or Jpg image to embroidery file free in this article. When supplied to the embroiderer, digitized files should be error-free in order to get the perfect embroidery sewed out. Without high-quality digitizing of embroidery, the performance can be a big mess. A professional embroidery digitizer can convert logo or Jpg image to Embroidery File within a few hours using embroidery digitizing software. Some designs require additional time and digitizing expertise due to their sophistication. Why You Need Embroidery Digitizing? You get repeated clients, which is a positive sign, but a company should not be limited to only a few. You keep thinking about ways to increase your brand’s visibility so that individuals come in more frequently. Have you considered advertising your brand through promotional apparel? An established technique to promote the brand to the masses is logo embroidery on shirts, caps, handkerchiefs, and jackets. Who doesn’t want stuff for free? With your logo embroidered, you can give a shirt or a hat for your customers. It will enable you to build a relationship between your company and the customer. Another benefit you get from it, as he wears it in various locations, your brand is marketed to many new people without any additional amount invested. How to Get Your Business Logo on a Cap or a Shirt You need the logo file provided by your designer if you plan to have your logo embroidered on a cap or a shirt. It will be in JPG, PNG, or some other format, but probably not in embroidery machines’ file format. Consequently, it can not be used to sew out embroidery yet. An embroidery digitizer is required to convert a JPG image or logo to an embroidery format. Requirements for Embroidery Digitizing Digitizing embroidery is possible with the aid of software built intentionally to convert standard image files into readable formats for embroidery machines, or in simple words convert logo Image or Jpg image to Embroidery File. A range of formats are used in the industry, such as EXP, DST, PES, JEF, and more. Ask him what format is needed if you have chosen an embroiderer because embroidery machines have their suitable file formats. You may be shocked to know that a different file format will be requested from every embroiderer. That is because embroidery machines, depending on their brand and model, accept very particular file formats. Each company has fitted their machine with a custom-designed programme that restricts it to specific file formats. Hence, according to his machine, the embroiderer needs the formats. How To Convert logo or Jpg image to Embroidery File for Free The first thing you should do to save the money does it yourself if you are not interested in paying for the digitization services. If a digitizer, who is also a human being, can do it just like you do, why can’t you? Sounds inspiring, right? To digitize, you don’t need to own a million-dollar rig; all you need is a standard PC and digitizing software. A number of embroidery digitizing tools, such as Wilcom, Pulse, Embird and more, are available. To convert the JPG image or logo to an embroidery file, you can purchase them. We suggest that you try a few and then determine which one of them fits your requirements. Regardless of the brand, with slight usability differences, they all serve the same function. Alternate Ways to Convert a JPG Image to an Embroidery File It would be best to look for a digitizer with reasonable digitizing costs because it is difficult to get free services without potentially ending up in some scam. Skilled digitizers, being a competitive business, have already reduced their charges to the lowest rates. At Punch Digitizing, we are experienced digitizers of embroidery, providing digitizing services for over more than ten years with pride and excellence

Convert logo or Jpg Image to Embroidery File Free Read More »